
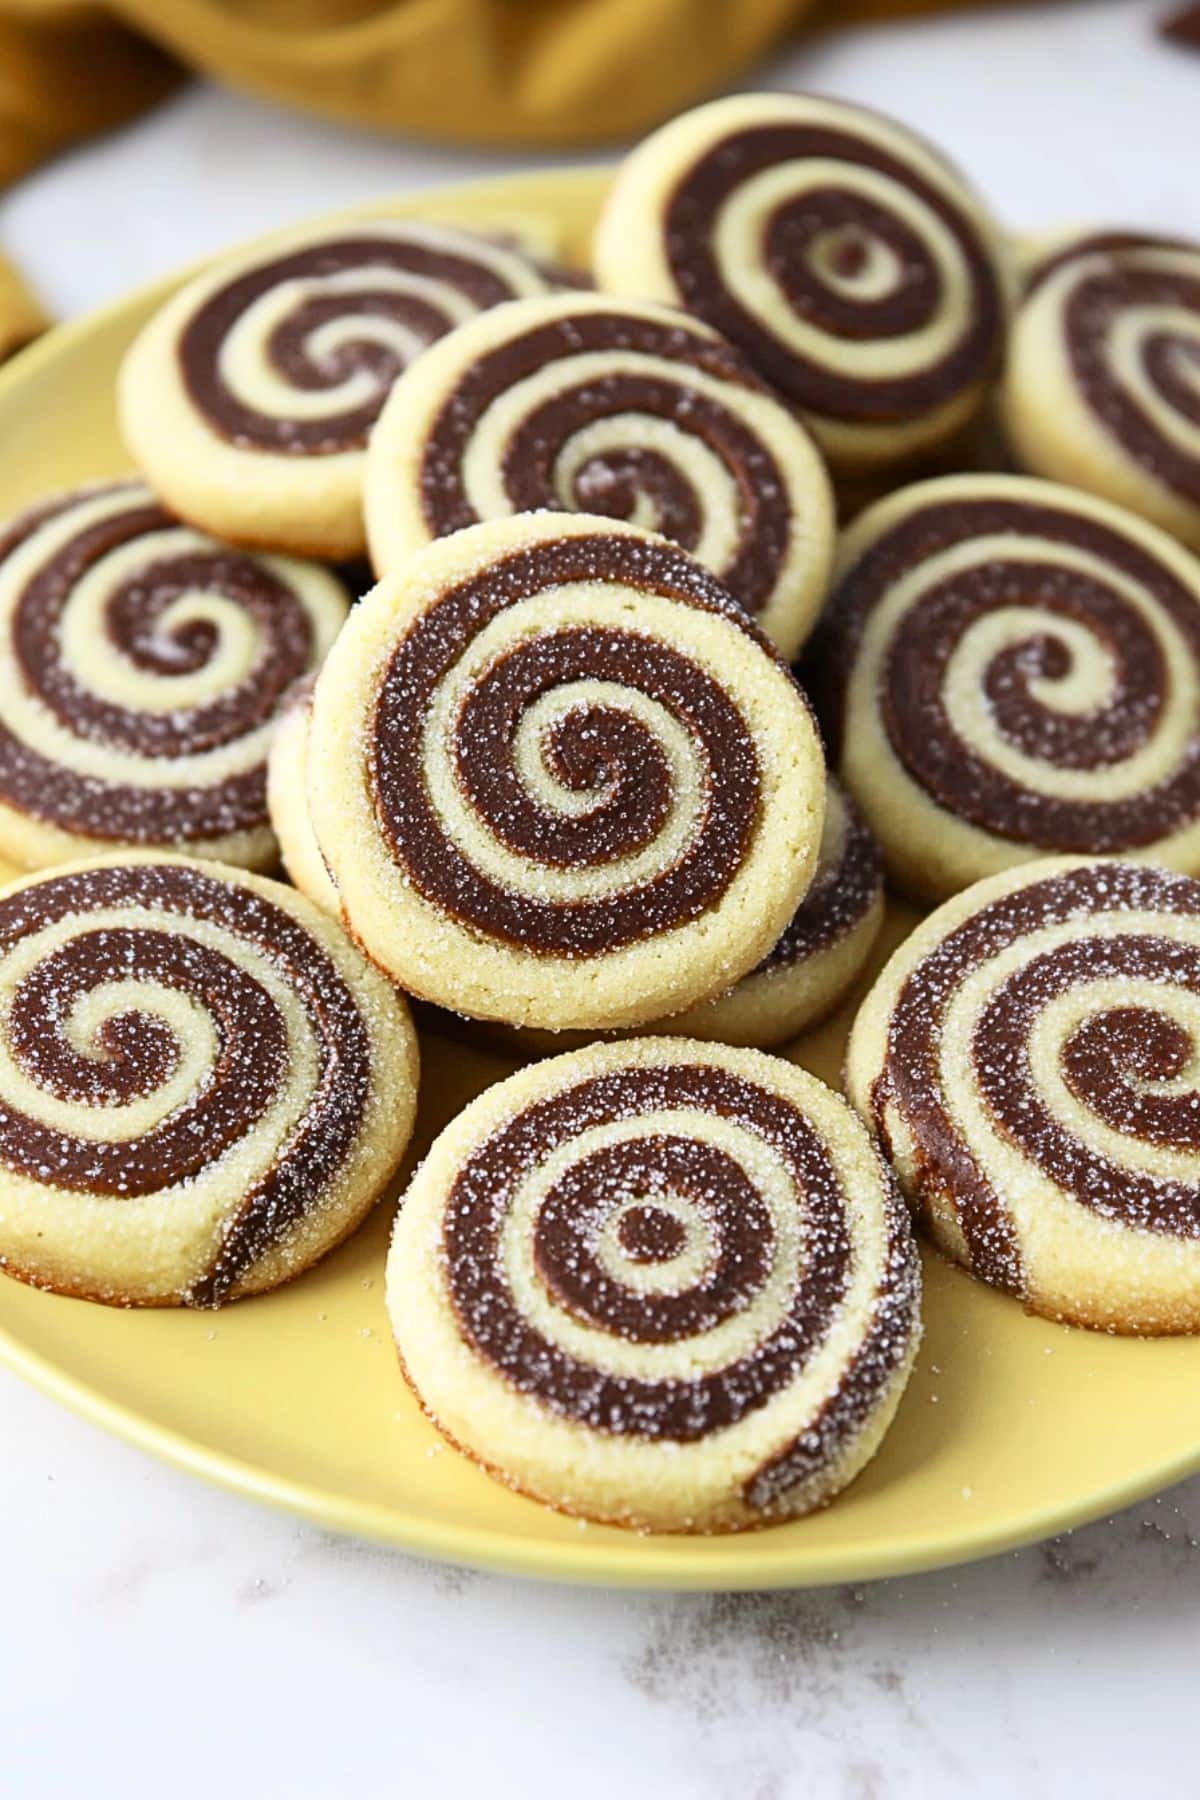
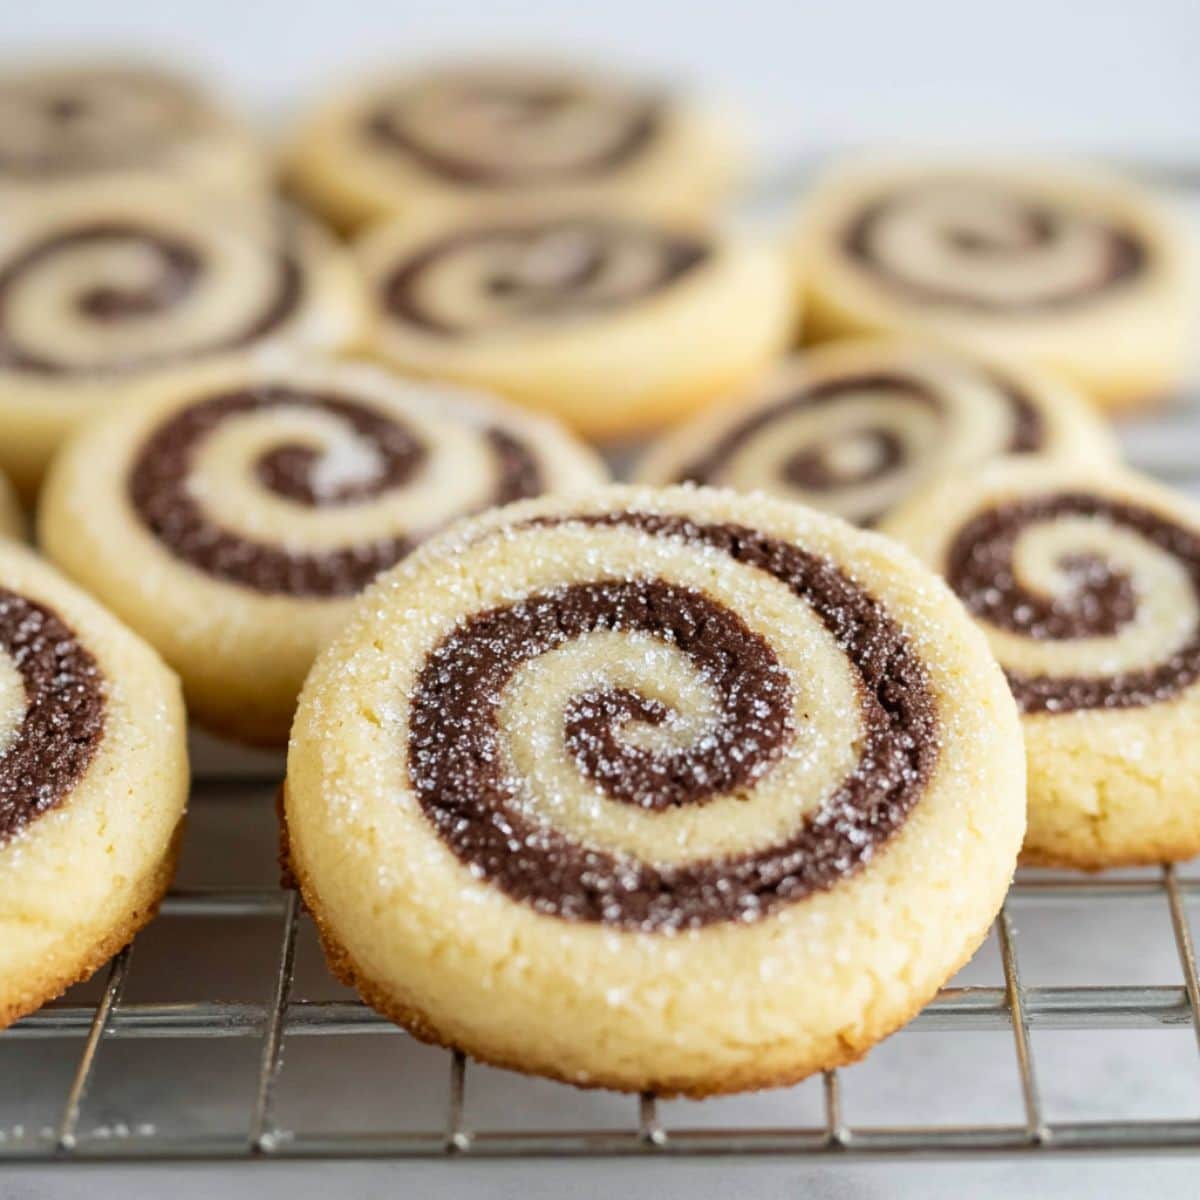
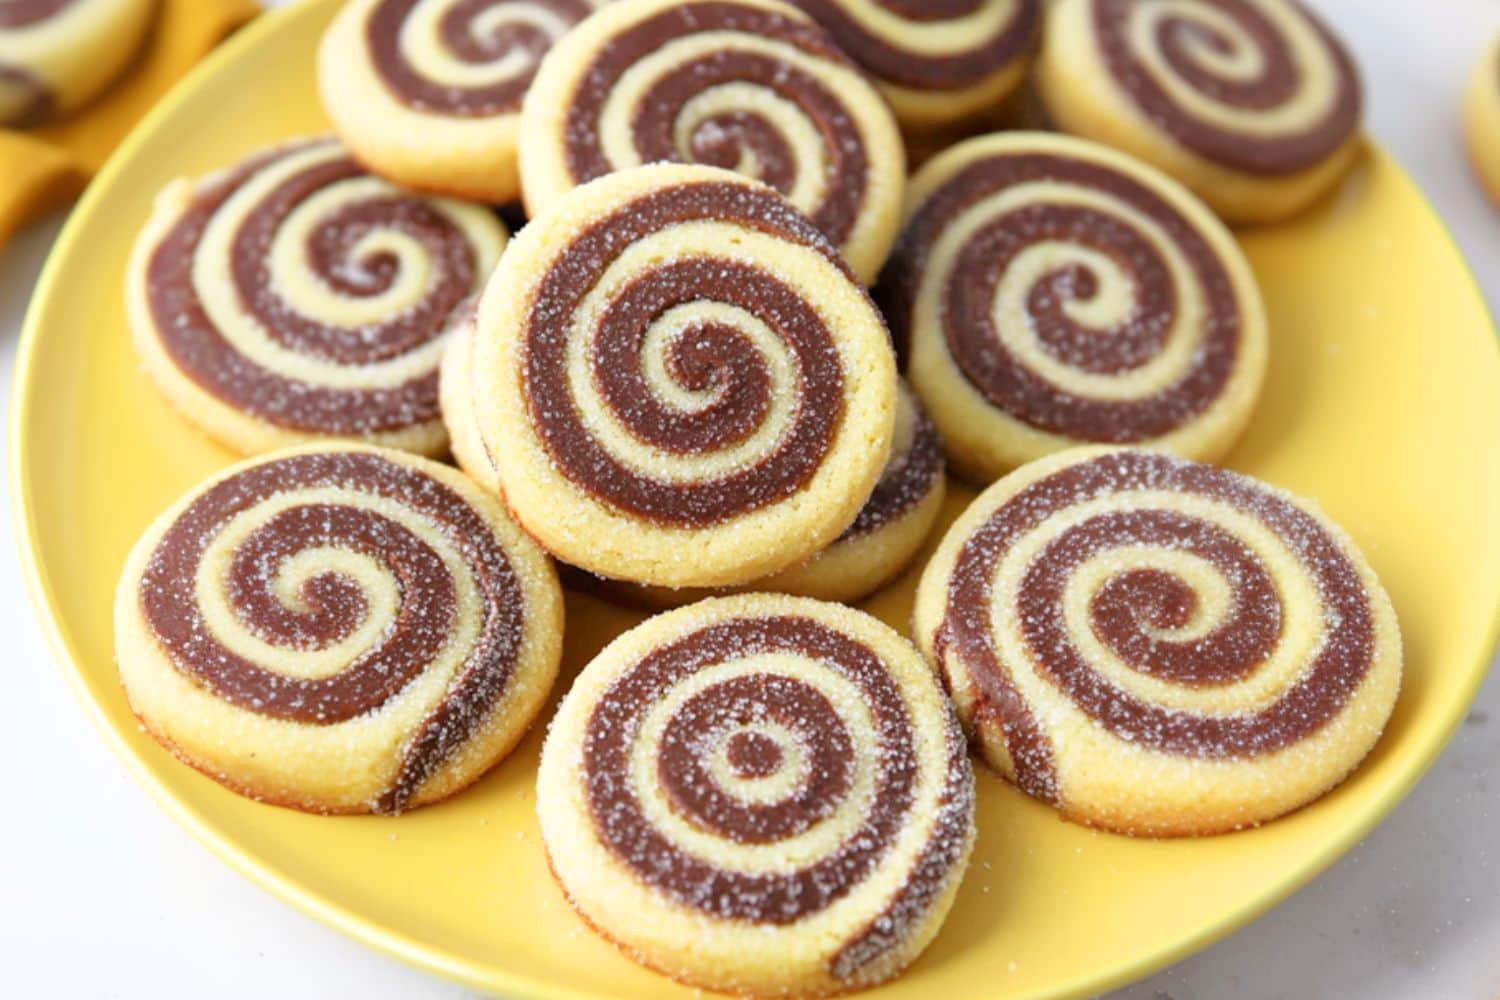
I made these chocolate pinwheel cookies yesterday and am absolutely in love!
They’re a delightful fusion of vanilla and chocolate, all rolled into an eye-catching spiral design.
With their buttery texture and balanced flavors, they’re both visually appealing and utterly delicious.
They’re also easy to make ahead and slice when needed, making them perfect for the holidays.
WANT TO SAVE THIS RECIPE?
Enter your email below & we’ll send it straight to your inbox.
Why You’ll Love These Pinwheel Cookies
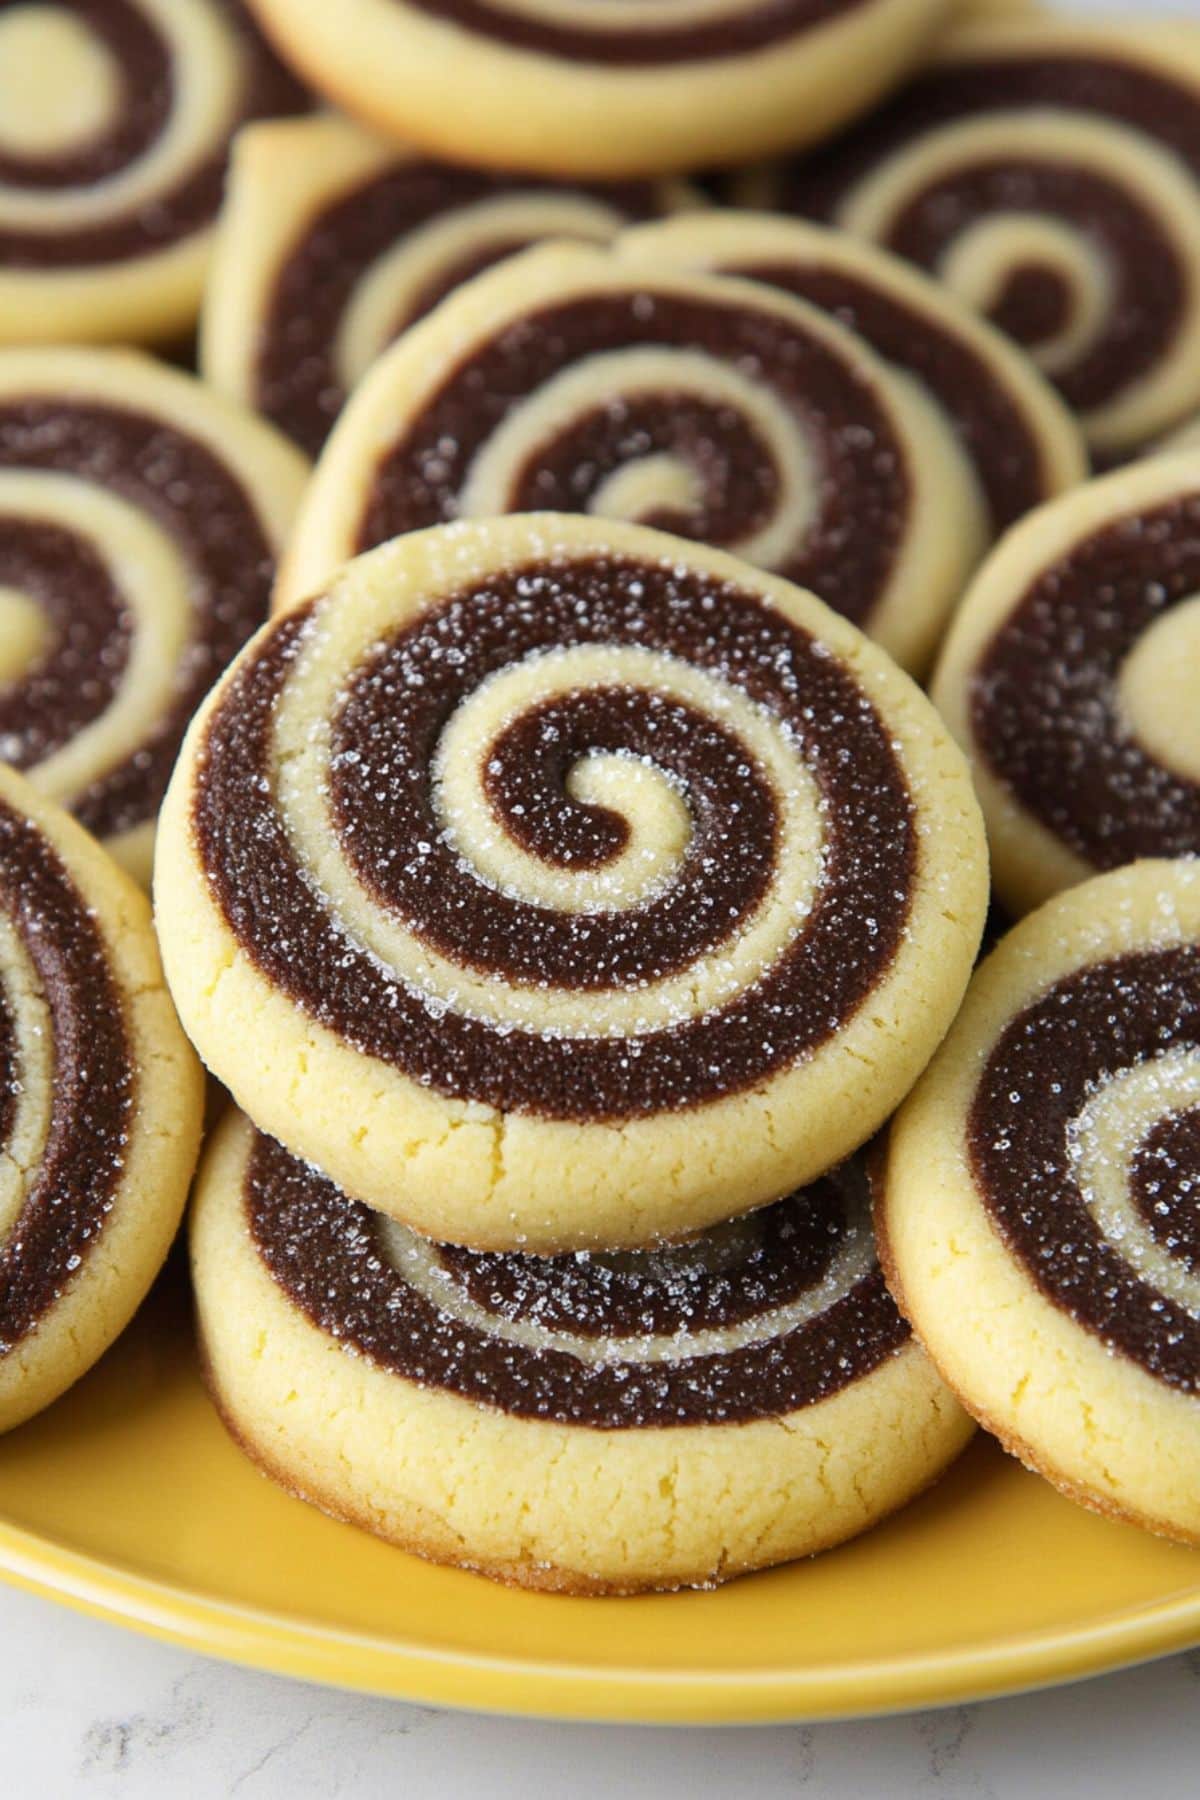
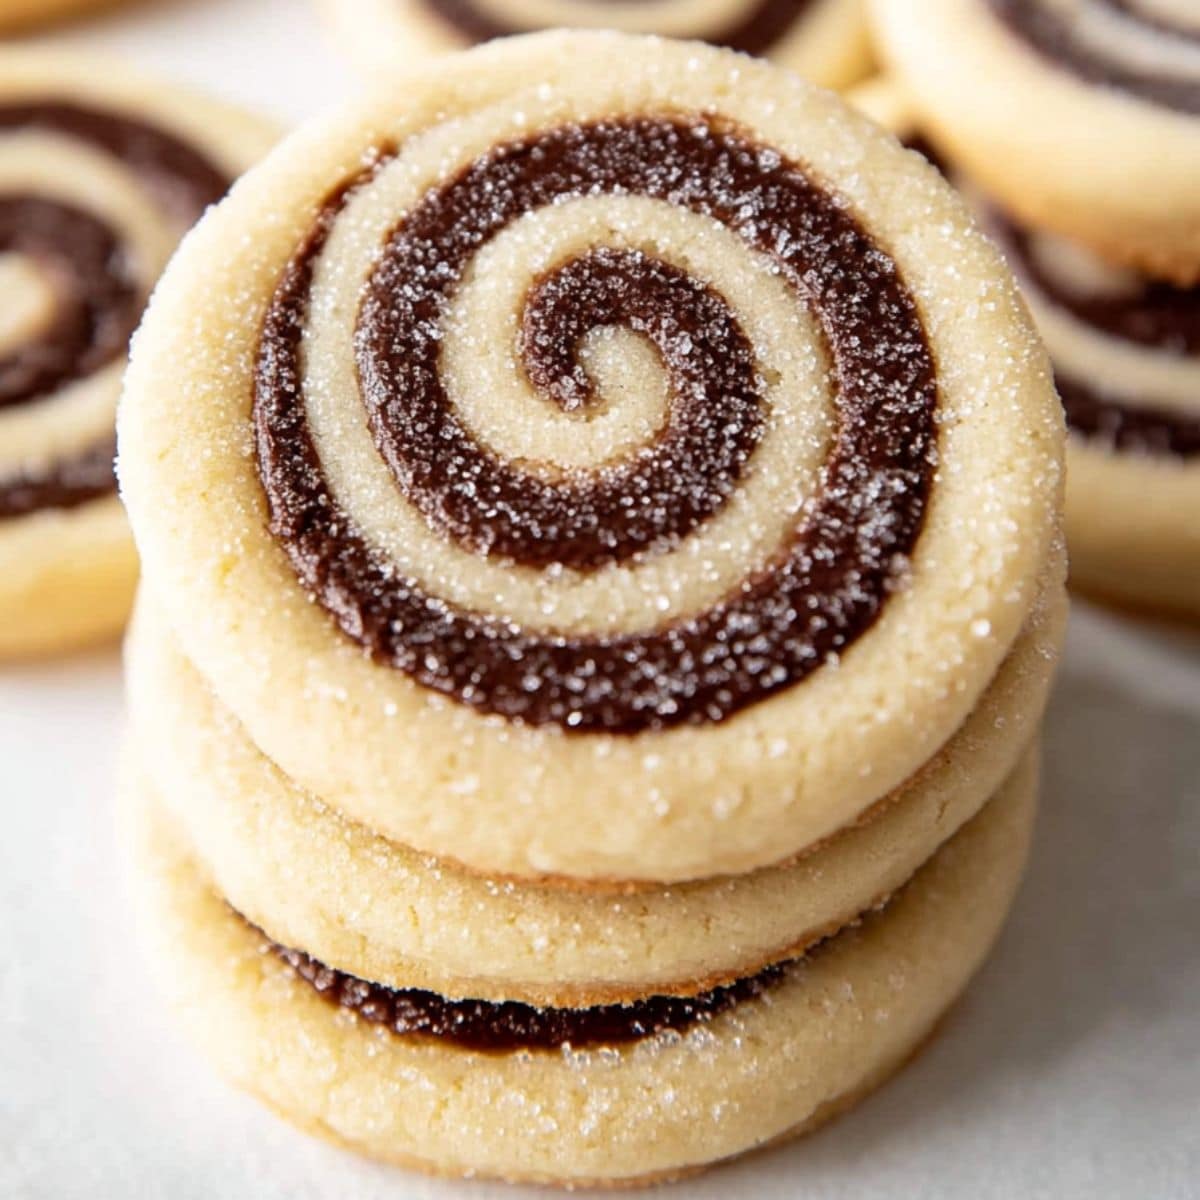
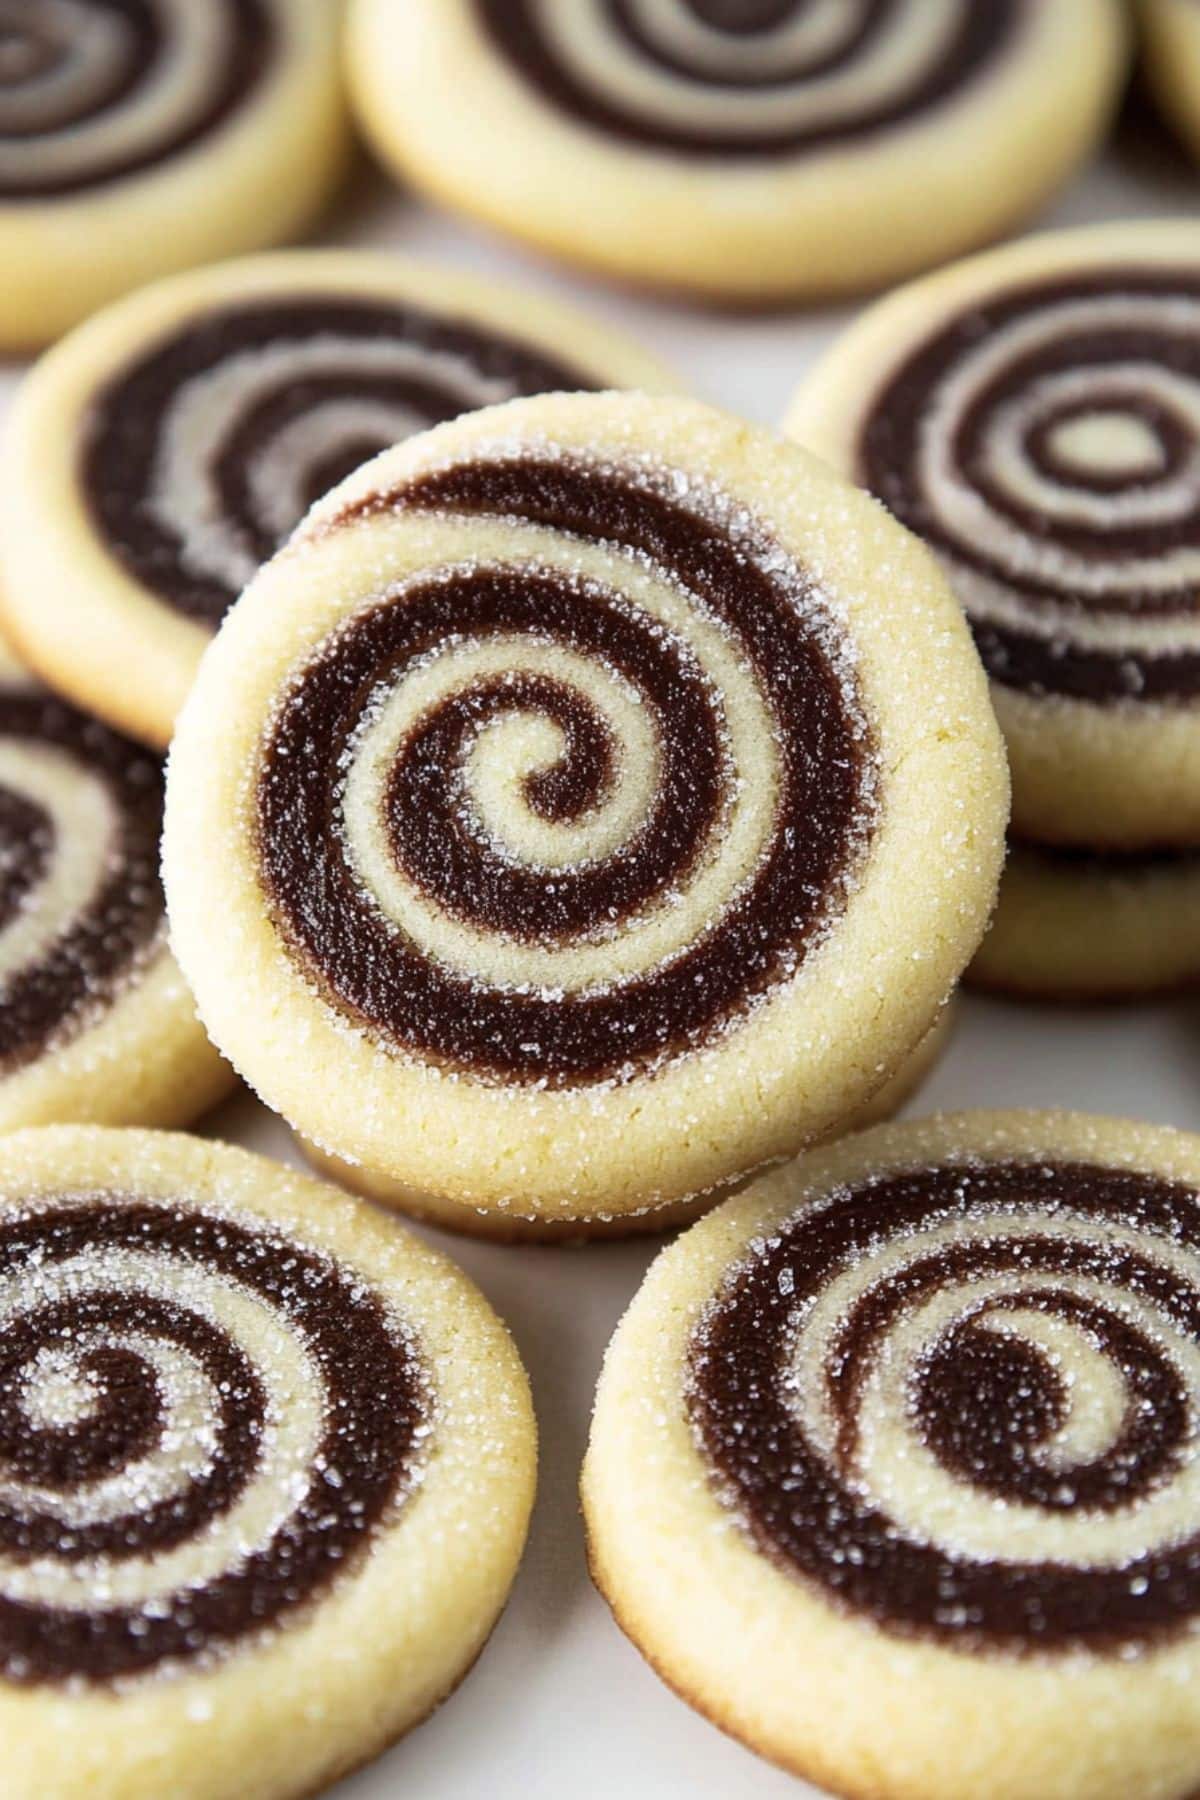
Fun Swirl Design: The dark and light spirals make these cookies visually striking and perfect for any celebration. Buttery & Rich Flavor: A smooth, buttery base pairs with rich chocolate for a flavor that’s both comforting and indulgent. Soft & Slightly Crisp Texture: Each bite is soft with a slight crispness, offering a delightful contrast in texture. Perfect for All Ages: Loved by kids and adults alike, these cookies are a crowd-pleaser at gatherings and family events.
Ingredients
All-Purpose Flour: The sturdy and reliable backbone for most cookie recipes . Remember to use the spoon and level method or weigh it so you don’t get too much.
Baking Powder: Helps the cookies rise and keeps them from being overly dense.
Salt: For balancing the flavors.
Unsalted Butter: The rich base that keeps things tender.
Granulated Sugar: Beyond just sweetening the cookies, sugar also provides those crisp golden edges.
Eggs: For binding everything together. You’ll use a couple of yolks to amp up the chewy texture.
Vanilla Extract: Adds depth, warmth, and a cozy, comforting aroma.
Unsweetened Cocoa Powder: Transforms half the dough into deeply rich chocolatey goodness.
Whole Milk: Adds moisture and helps incorporate the cocoa powder into the dough.
How to Make Pinwheel Cookies
These pinwheel cookies are fun and delicious and will rival even the best Crumbl cookies .
They’re also easy to make! Here are the steps:
- WHISK the flour, baking powder, and salt in a medium bowl. Set aside. 2. BEAT the butter and sugar until light and fluffy. Blend in the egg, yolks, and vanilla until smooth. 3. COMBINE the dry ingredients with the wet ingredients until just incorporated. The dough will be thick and sticky. 4. DIVIDE the dough in half and mix the cocoa powder and milk into one portion. 5. ROLL each portion of dough between sheets of parchment paper into approximately 9×13-inch rectangles. Chill for 30 minutes, and then remove the top sheets of parchment. 6. FLIP the chocolate dough onto the vanilla dough and roll from the long side into a log. Wrap in plastic and chill for at least 2 hours or overnight. 7. PREHEAT the oven to 350°F (175°C) and line two baking sheets with parchment paper. 8. SLICE the chilled dough into 1/2-inch thick rounds and press into granulated sugar (optional) before placing on the prepared baking sheets about 2 inches apart. 9. BAKE for 10-12 minutes until the edges are lightly golden. Let cool on the baking sheet for 5 minutes before transferring to a wire rack. Enjoy!
Tips for the Best Pinwheel Cookies
Keep these tips in mind when making pinwheel cookies:
Halve the dough evenly. It doesn’t need to be down to the gram but try to make the dough halves as even as possible. If they aren’t, the pinwheel pattern won’t be balanced.
Be gentle. It’s important not to overmix the dough, so combine the wet and dry ingredients gently. Also, be careful when pressing the chocolate dough on the vanilla. Don’t press so hard that the dough is squished or loses its shape.
Make them extra neat. Press each dough half into a 9×13-inch baking dish (lined with parchment), then chill. This will give you the neatest edges. Alternatively, roll the dough, layer, and trim the edges with a pizza cutter.
Roll tightly. The tighter the log, the more compact and attractive the pinwheel pattern.
Do you really need parchment paper? You can, of course, roll the dough on a lightly floured surface. However parchment helps not only with sticking but flipping the dough. You can simply lift the paper, which prevents cracks.
Chill overnight. This will give you the neatest cookies.
Use a sharp knife. A super-sharp knife will slice more cleanly through the logs without crushing or tearing them. Wipe the knife clean between cuts, as well.
Chill the sliced rounds. After placing the dough slices on the baking sheets, pop them in the fridge or freezer. A mere 10 minutes will go a long way toward helping the cookies hold their shape.
Variations
You can also tweak the recipe to suit your tastes. Here are some examples:
Swap out the cocoa powder. Use matcha powder for a more earthy taste and an attractive green swirl. (This is an excellent variation for St. Paddy’s Day!) Or use espresso powder for a stronger, more robust taste.
Use extracts. Add almond or orange zest to the vanilla half of the dough for uniquely flavored cookies. Mint extract goes well in the chocolate dough, as well.
Add a little spice. For a spicier flavor, use cinnamon or nutmeg instead of cocoa powder. These won’t change the color much, though, so you might want to add food coloring.
Incorporate mix-ins. Add crushed nuts, coconut flakes, or crushed cookies between the dough layers.
How to Store
Want to make these chocolate pinwheels for the holidays? Here’s how to make them ahead and store them:
More Easy Cookie Recipes You’ll Love
Orange Creamsicle Cookies Graham Cracker Cookies with Frosting Salted Caramel Chocolate Chip Cookies Raspberry Thumbprint Cookies
Pinwheel Cookies
25-30
30
12
145
With swirls of chocolate and vanilla in every bite, these delightful pinwheel cookies are buttery, fun, and perfect for any occasion or celebration.
Ingredients
- 3 cups (360g) all-purpose flour
- 1 teaspoon baking powder
- 1/2 teaspoon salt
- 1 cup unsalted butter, softened
- 1 1/4 cup granulated sugar
- 1 large egg + 2 egg yolks, room temperature
- 2 teaspoons vanilla extract
- 2 tablespoons unsweetened cocoa powder
- 1 tablespoon whole milk
- optional: 1/2 cup granulated sugar
Instructions
- In a medium bowl, whisk the flour, baking powder, and salt. Set aside.
- In a large bowl, beat the butter and sugar with an electric mixer on medium speed until light and fluffy, about 2 minutes.
- Reduce the speed to low and blend in the egg, egg yolks, and vanilla extract until smooth.
- Add the dry ingredients to the wet and mix on low until just combined. The dough will be thick and sticky.
- Divide the dough in half, removing one portion from the bowl. Add the cocoa powder and milk to the dough in the bowl and beat on low speed until fully incorporated.
- Place each portion of dough onto separate sheets of parchment paper. Place another sheet of parchment over each portion of dough and roll them into rectangles, about 9×13 inches. Place the cookie dough sheets on a baking tray and refrigerate for about 30 minutes.
- Remove the top sheets of parchment paper. Then, carefully flip the chocolate dough onto the vanilla dough, using the parchment to help line them up. Press together gently, then remove the top layer of parchment paper from the chocolate cookie dough.
- Starting from the long side, tightly roll the dough into a log, using the bottom sheet of parchment paper to help keep it tight. Use the warmth from your hands to help keep it pliable. Move slowly and gently press together any cracks.
- Wrap the log in plastic wrap and refrigerate for at least 2 hours or overnight.
- Preheat the oven to 350 degrees Fahrenheit (175°C) and line two baking sheets with parchment paper.
- Slice the chilled dough into 1/2-inch thick rounds. If desired, press one side of each cookie in the extra granulated sugar for a frosted effect. Place cookies sugar side up on the prepared baking sheets about 2 inches apart.
- Bake for 10-12 minutes, until the edges are lightly golden. Let cool on the baking sheet for 5 minutes before transferring to a wire rack. Enjoy!
Notes
Halve the dough evenly. It doesn’t need to be down to the gram but try to make the dough halves as even as possible. If they aren’t, the pinwheel pattern won’t be balanced.
Make them extra neat. Press each dough half into a 9×13-inch baking dish (lined with parchment), then chill. This will give you the neatest edges.
Roll tightly. The tighter the log, the more compact and attractive the pinwheel pattern.
Share on Facebook
Share on Pinterest

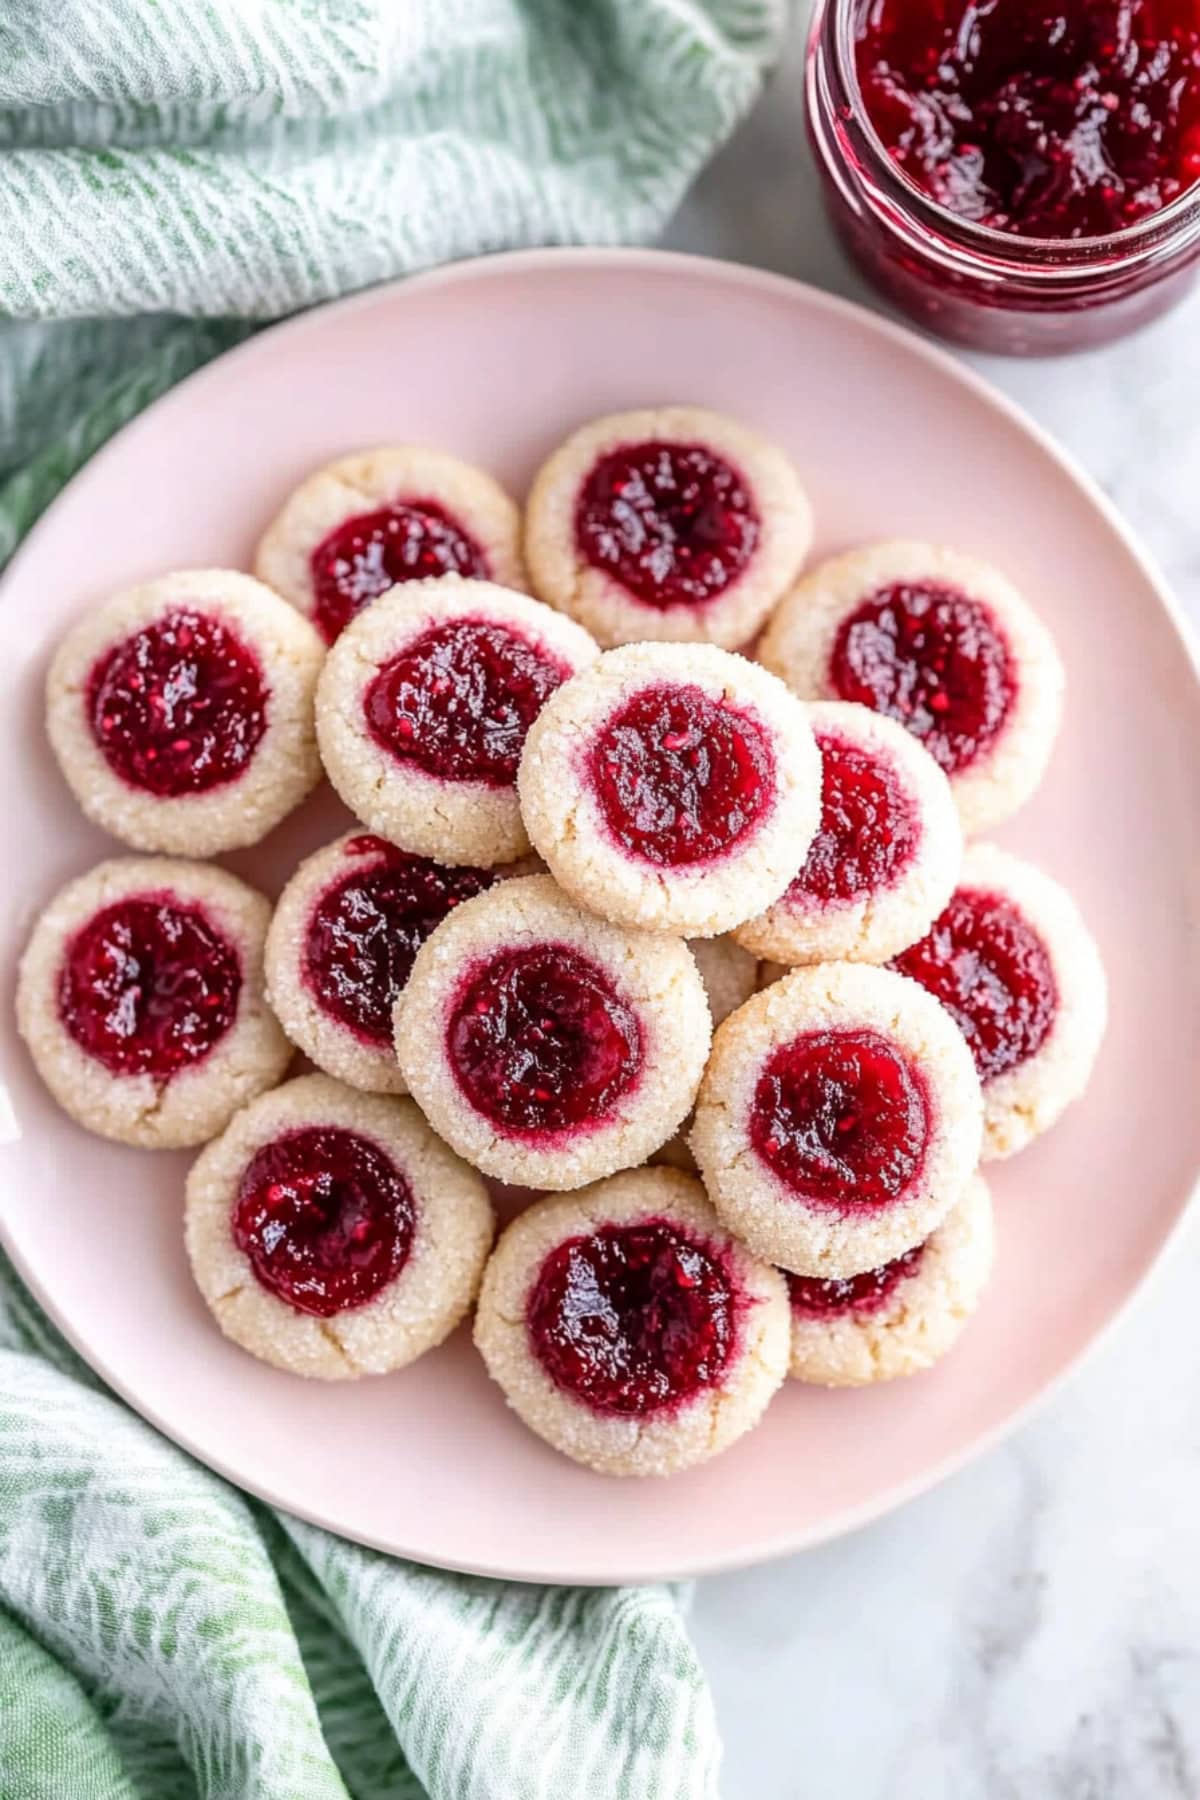
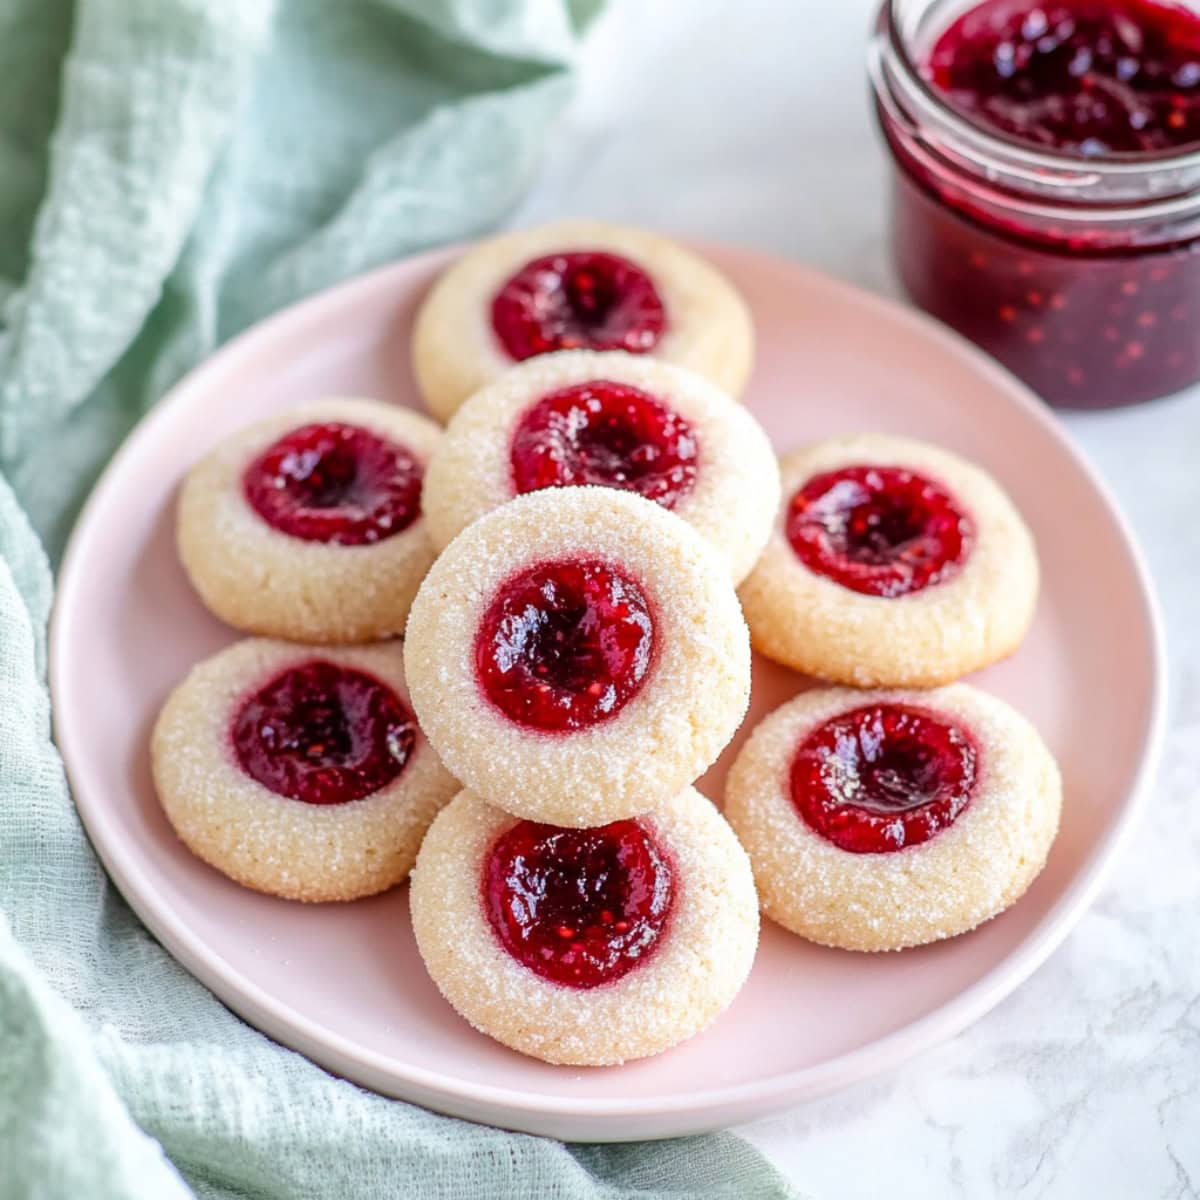
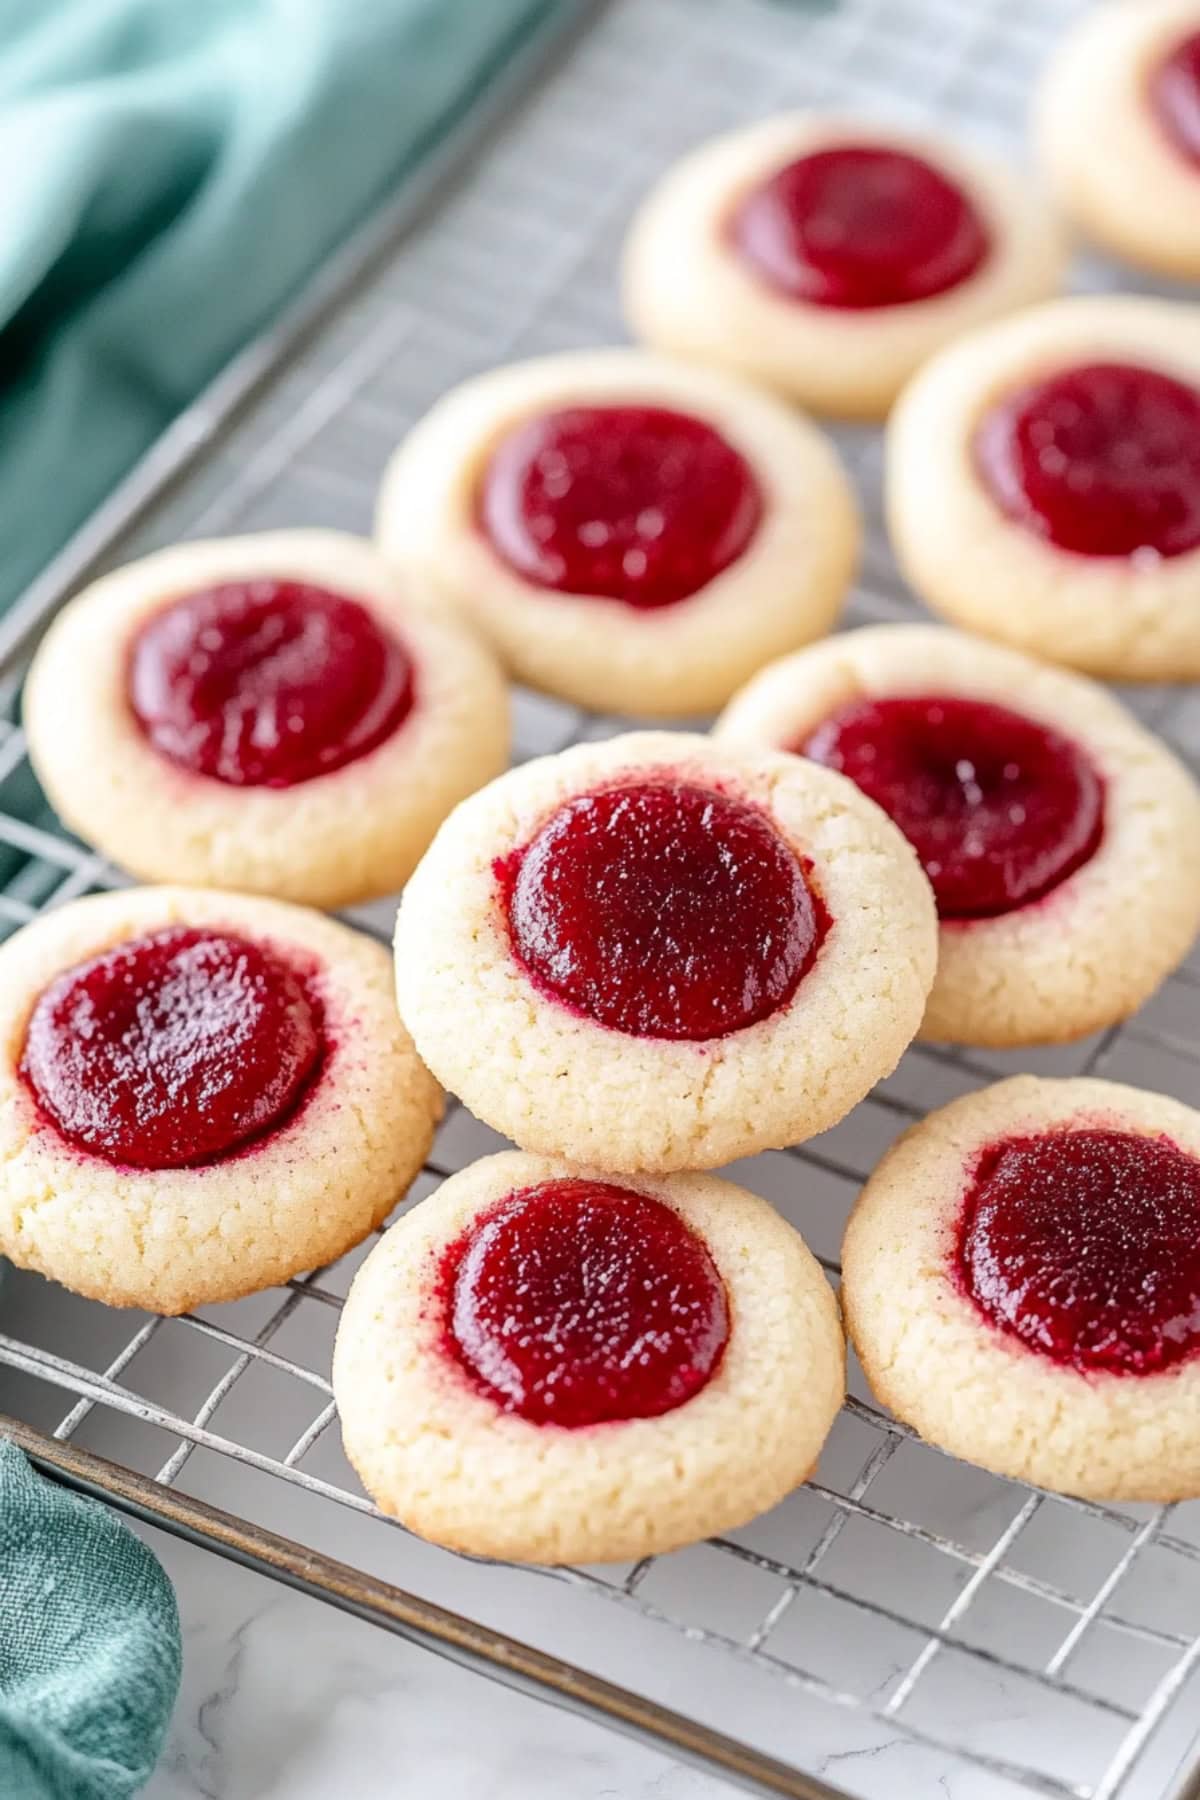
I’m channeling my inner grandma today with these dreamy raspberry thumbprint cookies!
These beauties are delicate yet sturdy, buttery yet bright, and somehow manage to be both elegant and cozy at the same time.
With a tender shortbread base and a vibrant raspberry center, they’re as beautiful as they are delicious.
Sometimes, the simplest cookies are the most special, don’t you think?
WANT TO SAVE THIS RECIPE?
Enter your email below & we’ll send it straight to your inbox.
Why You’ll Love These Raspberry Thumbprint Cookies
Ingredients
Unsalted Butter : Adds rich, creamy texture and depth.
Granulated Sugar : Sweetens the dough and gives a slight crunch to the outside.
Egg Yolk : Brings a touch of richness and helps bind the dough.
Vanilla Extract : Infuses warmth and classic flavor.
Almond Extract : Adds a hint of nutty aroma and depth. It’s quite strong, so start with 1/4 teaspoon if you’re unsure.
Lemon Zest (optional) : Lends a fresh, citrusy note to brighten each bite.
All-Purpose Flour : Forms the base for a tender, delicate structure.
Salt : Balances the sweetness and enhances flavor.
Raspberry Jam : Brings a fruity pop of flavor and a hint of tartness.
How to Make Raspberry Thumbprint Cookies
Whether you’re baking for a special occasion or just treating yourself on a cozy afternoon, these cookies are sure to bring a smile to your face.
Better yet, they’re elegant enough for a holiday party but simple enough for an everyday indulgence.
Here’s how to make them:
- BEAT the softened butter and sugar until light and fluffy, about 2-3 minutes. Blend in the egg yolk, vanilla, almond extract, and lemon zest until smooth. 2. ADD the flour and salt, mixing gently by hand until a soft dough forms. 3. CHILL the dough in the refrigerator for 2-3 hours. 4. PREHEAT the oven to 350°F (175°C) and line two baking sheets with parchment paper. 5. SCOOP the chilled dough into 1-inch balls, about 1 tablespoon each. Roll each ball in granulated sugar and place them 2 inches apart on the baking sheet. 6. INDENT each ball gently with your thumb or the back of a spoon. Fill with 1/2 teaspoon of raspberry jam. 7. BAKE for 12-14 minutes, until the edges are lightly golden and centers are set. 8. COOL the cookies briefly on the baking sheet, then transfer them to a wire rack to cool completely. Enjoy!
Tips For the Best Raspberry Thumbprint Cookies
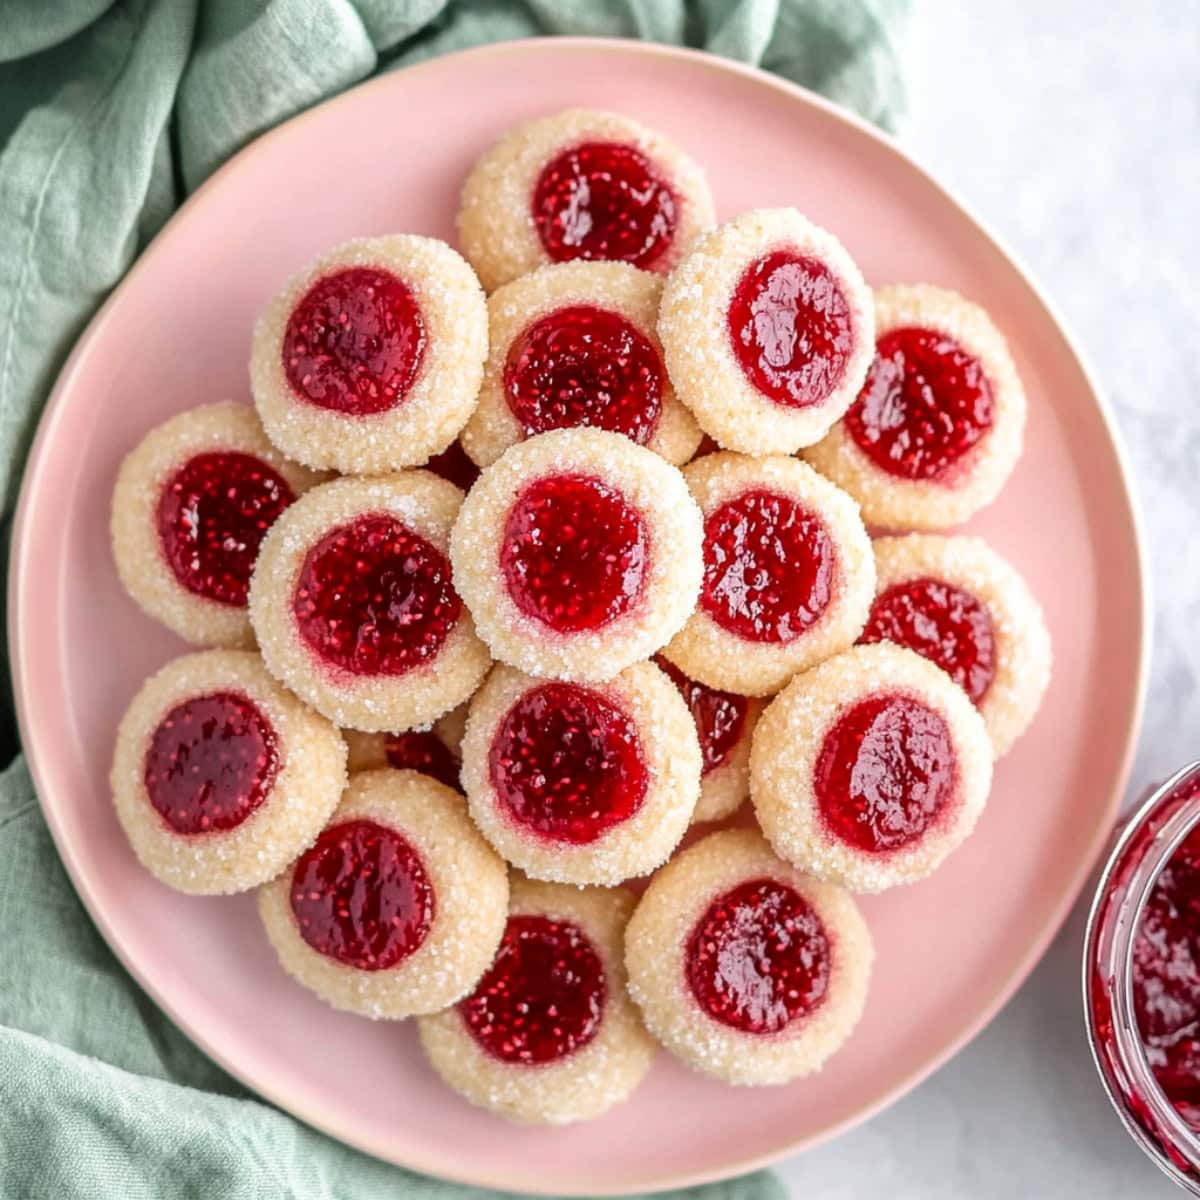
I’ve always thought these cookies look like little jewels on a cookie plate, and they never fail to disappear first at family gatherings.
The secret? A hint of almond extract and fresh lemon zest makes them taste like they came from a fancy patisserie!
Need a few more tips? I’ve got a bunch!
Accurate measurements. To ensure consistent results, use a kitchen scale for precise ingredient measurements. Alternatively, spoon the flour into the measuring cup and level it off with the back of a knife.
Room temperature ingredients. Get chilled ingredients out of the fridge 20-30 minutes early. It’ll make mixing easier.
Chill the dough. If you bake this dough right away, it’ll spread flat. Instead, cover and chill until firm. Also, remember to keep chilled any dough you’re not baking (if baking in batches).
Roll in sugar. It’s not mandatory, but it adds a nice crisp coating to the cookies.
Fixing cracks. If the dough cracks when making the indents, gently press it back together with your fingers. The warmth should help.
Jam application. Don’t overfill the cookies with jam or it’ll spill over the sides and burn on the baking tray.
Let them cool. When warm, the jam might burn your tongue, and the cookies can feel paste-like. So, be sure to let them cool fully before enjoying.
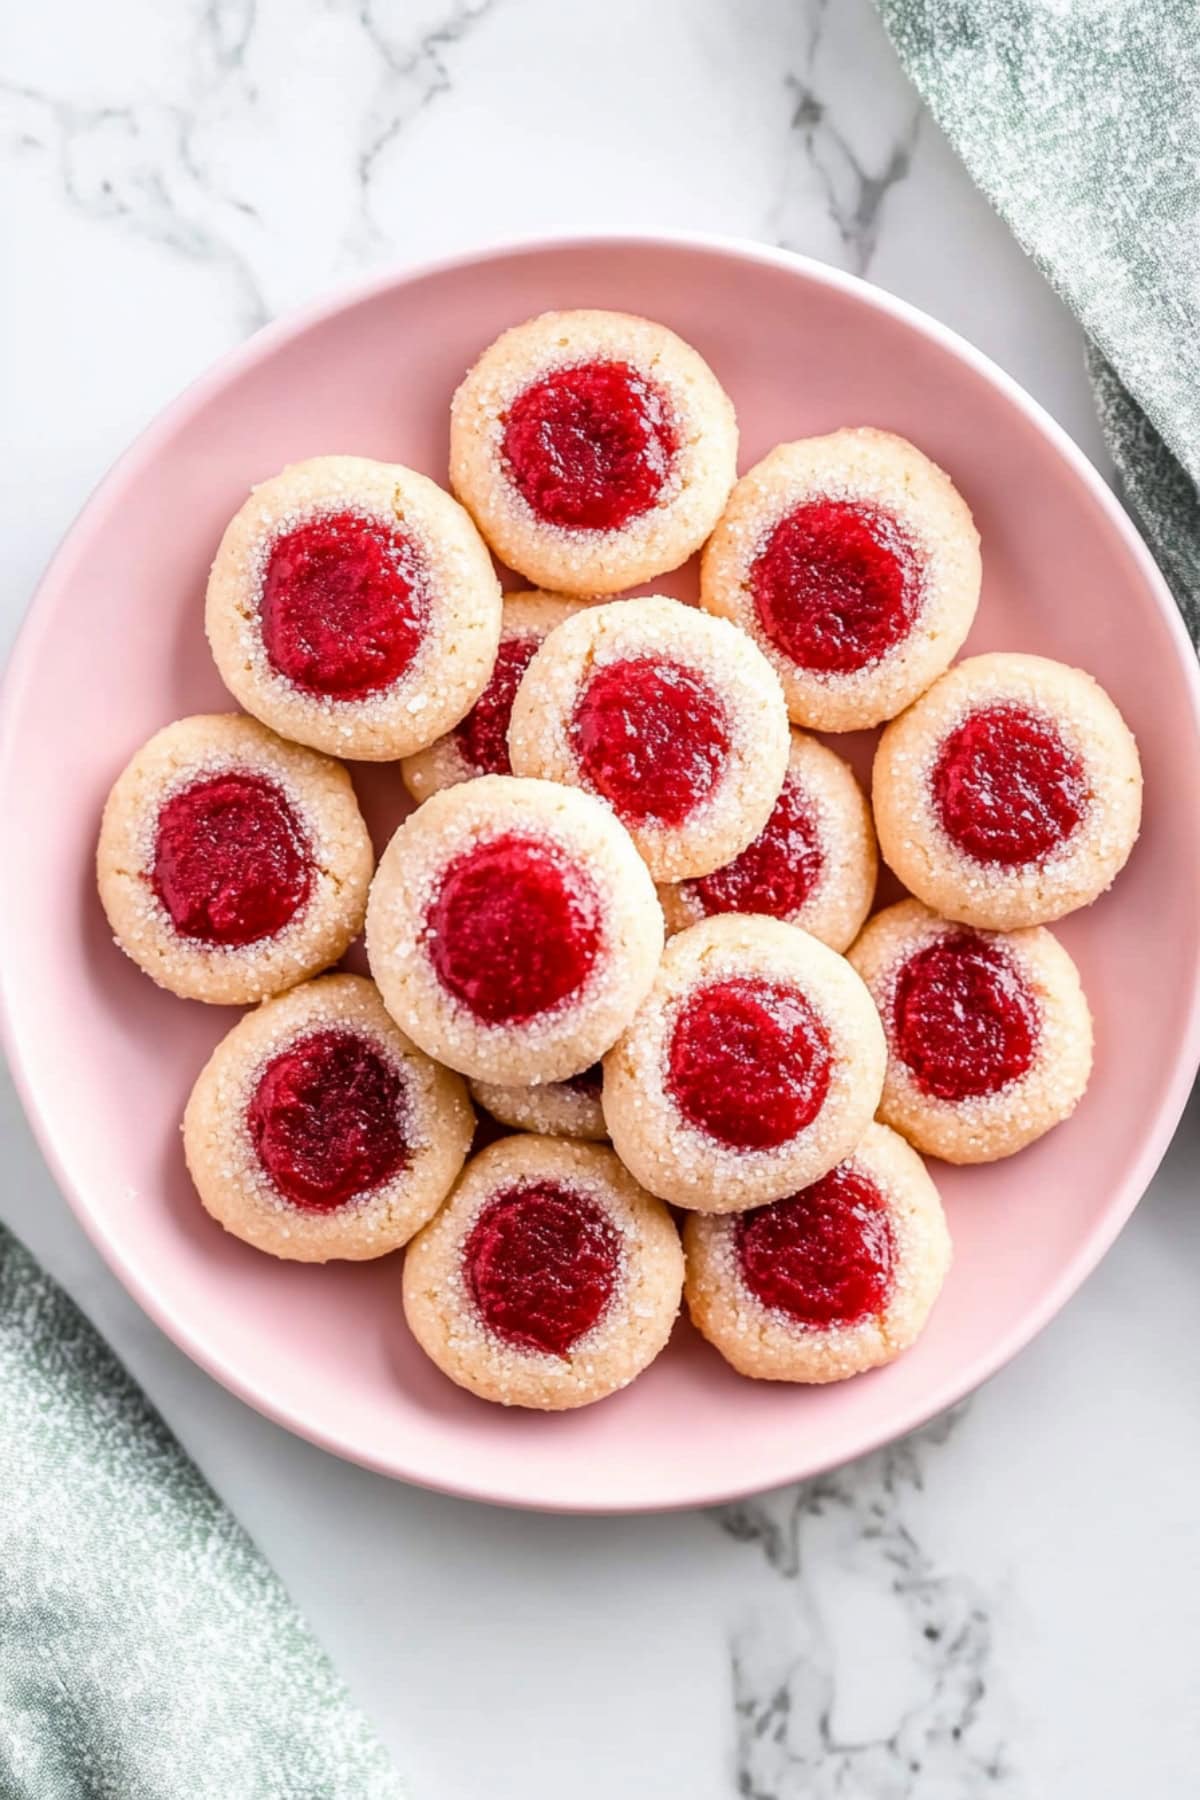
How to Store
Want to make these ahead? You can!
More Fruity Cookies You’ll Love
Lemon Cooler Cookies White Chocolate Raspberry Cookies Lemon Raspberry Cookies Orange Cranberry Cookies
Raspberry Thumbprint Cookies
25-30
15
14
120
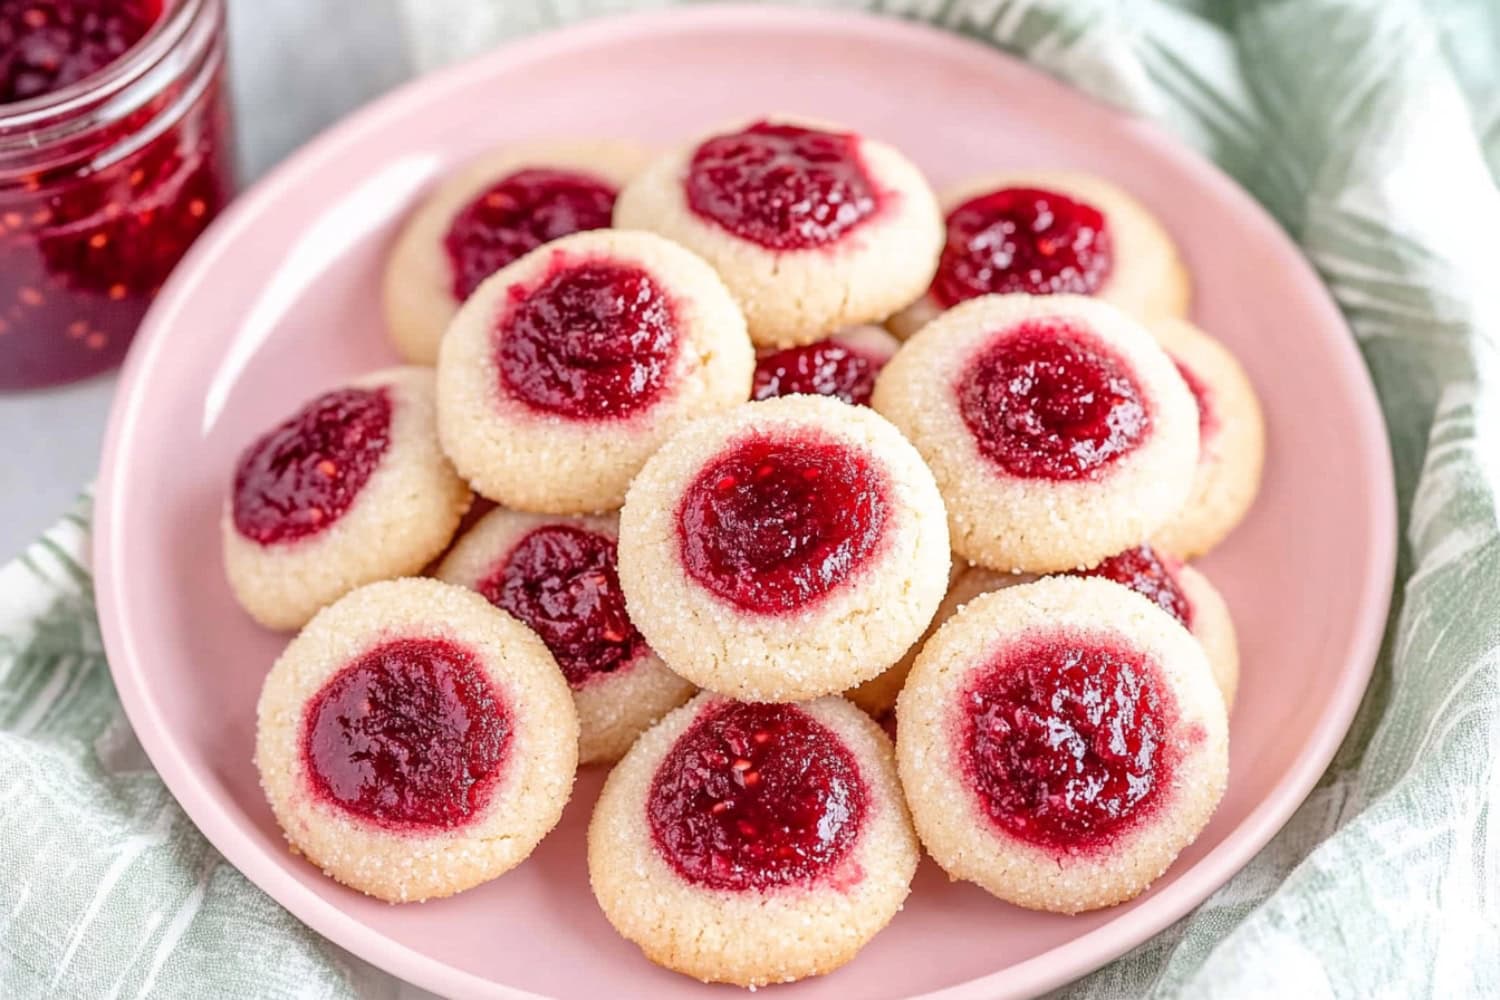
These buttery, soft raspberry thumbprint cookies with sticky jam center bring a little fruity magic to every bite. They’re almost too good to share!
Ingredients
- 1 cup unsalted butter, softened
- 3/4 cup granulated sugar, plus more for rolling
- 1 large egg yolk
- 1 teaspoon vanilla extract
- 1/4-1/2 teaspoon almond extract, to taste
- zest of 1 lemon, optional
- 2 1/2 cups all-purpose flour
- 1/2 teaspoon salt
- 1/2 cup raspberry jam
Instructions
- In a large mixing bowl, beat the softened butter and sugar with an electric mixer on medium speed until light and fluffy, about 2-3 minutes.
- Reduce the speed to low and blend in the egg yolk, vanilla, almond extract, and lemon zest until smooth and well combined.
- Add the flour and salt, mixing gently by hand just until a soft dough forms. Cover the bowl with plastic wrap and refrigerate for 2-3 hours.
- Preheat the oven to 350°F (175°C) and line two baking sheets with parchment paper.
- Scoop the chilled dough into 1-inch balls (about 1 tablespoon). Roll each ball in granulated sugar to coat, then place them about 2 inches apart on the baking sheet.
- Use your thumb or the bottom of a wooden spoon to make a small indent in the center of each dough ball. Be gentle to avoid cracking. Fill the indent with about 1/2 teaspoon of raspberry jam.
- Bake for 12-14 minutes or until the edges are lightly golden. The cookies should be soft but set in the middle.
- Let the cookies cool on the baking sheet for a few minutes before transferring them to a wire rack to cool completely. Serve at room temperature and enjoy!
Notes
Use a kitchen scale to measure ingredients for the most accurate, consistent results.
Chilling the dough helps the cookies keep their shape while baking, so don’t skip this step.
If the dough cracks when making the indents, gently press it back together with your fingers.
Share on Facebook
Share on Pinterest
