

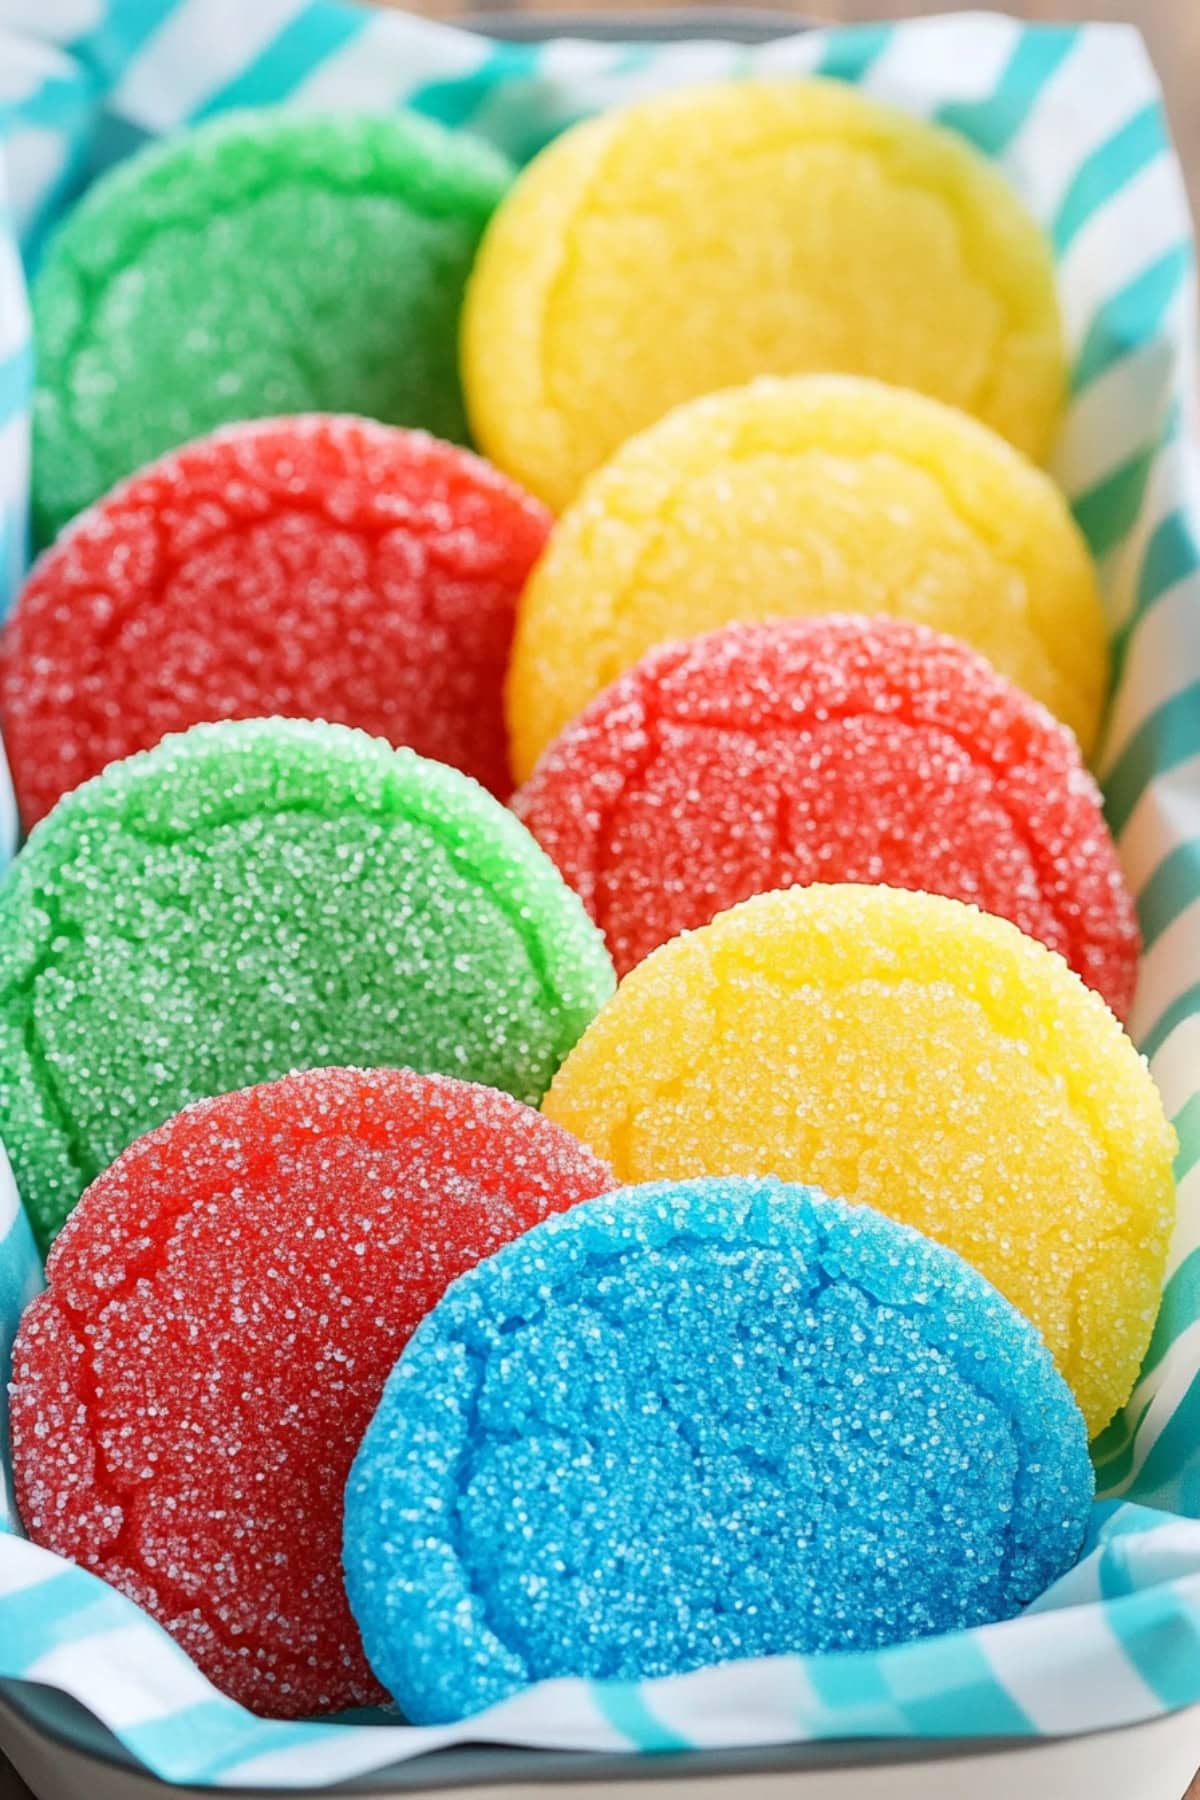
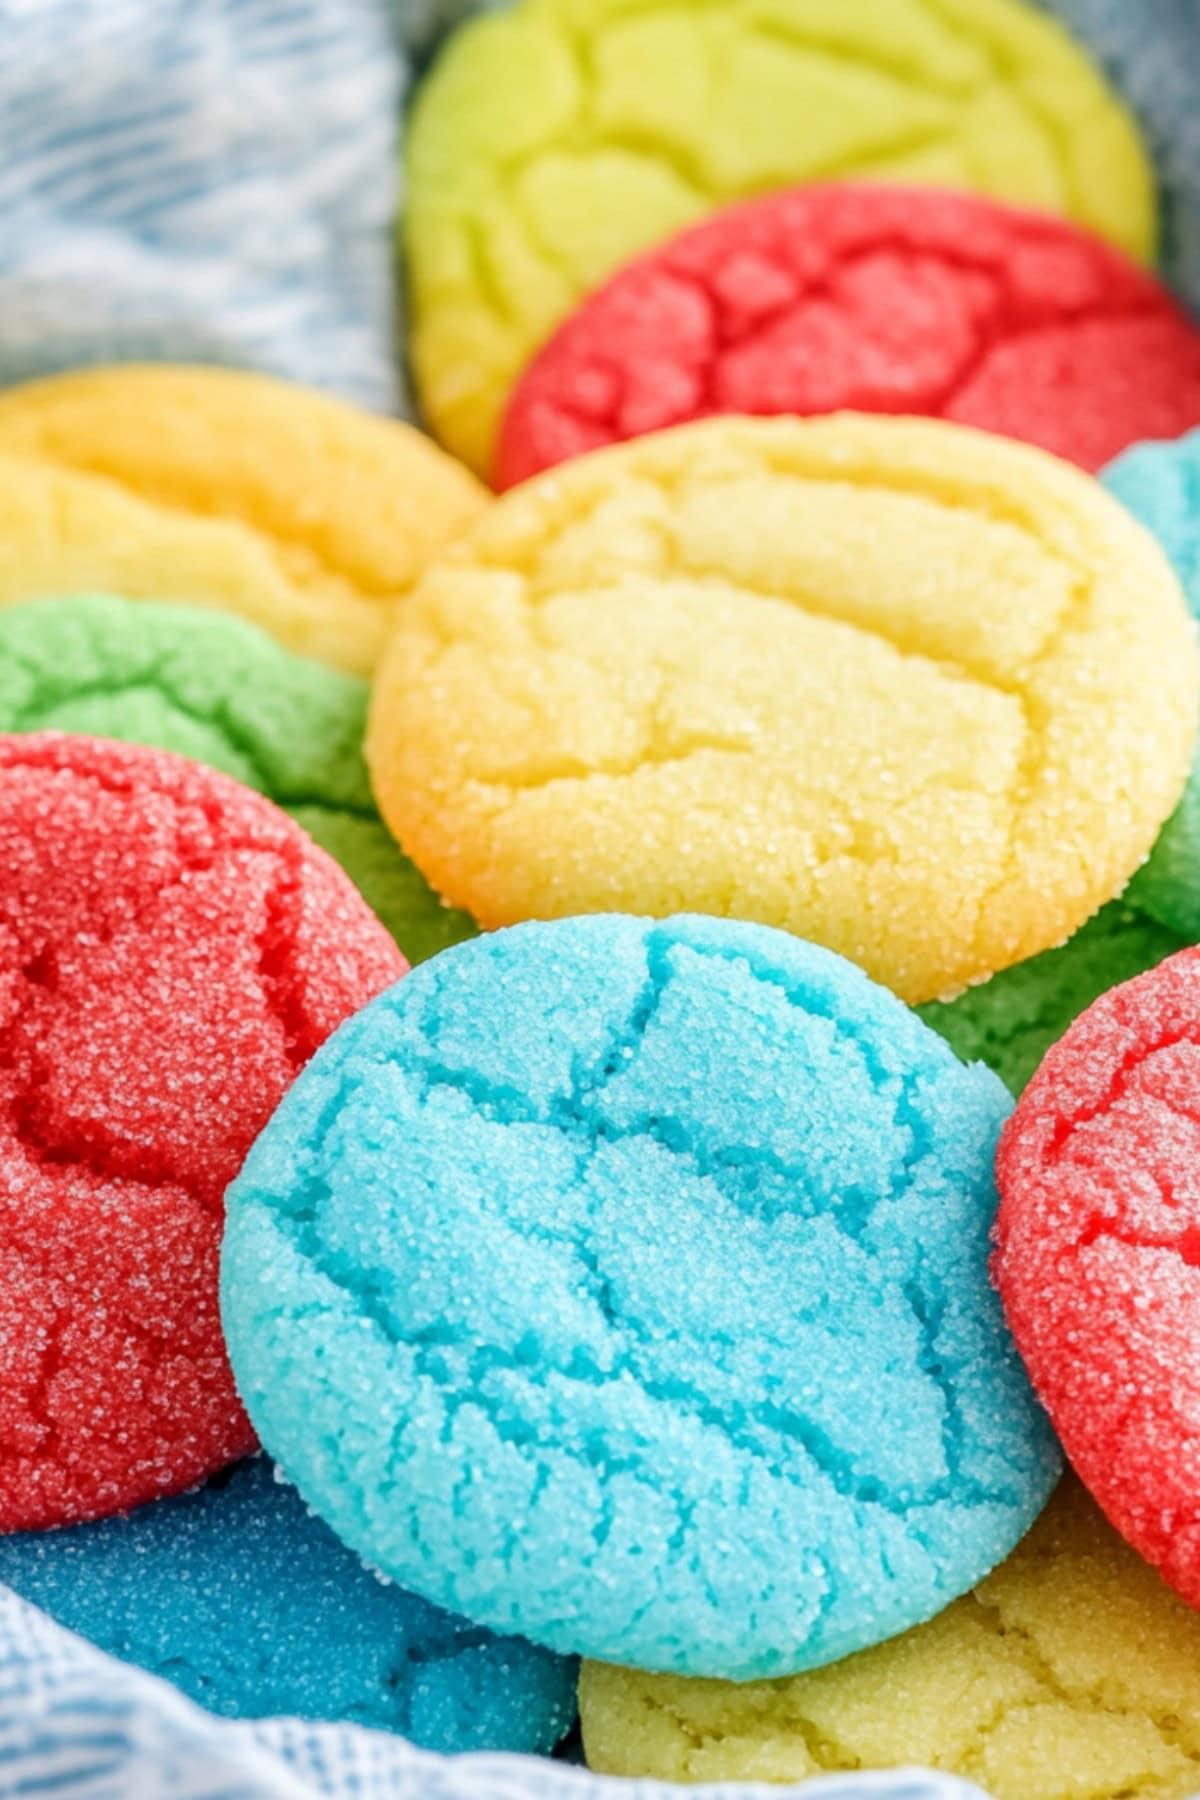
Brighten up your day with these vibrant and delicious jello cookies!
They’re soft, chewy, and packed with nostalgic fruity goodness that’ll transport you right back to childhood.
Rolling these beauties in sugar before baking gives them a delightful crunch and an extra touch of sweetness.
With their rainbow appearance and irresistible taste, these cookies are sure to bring smiles all around.
WANT TO SAVE THIS RECIPE?
Enter your email below & we’ll send it straight to your inbox.
Why You’ll Love These Jello Cookies
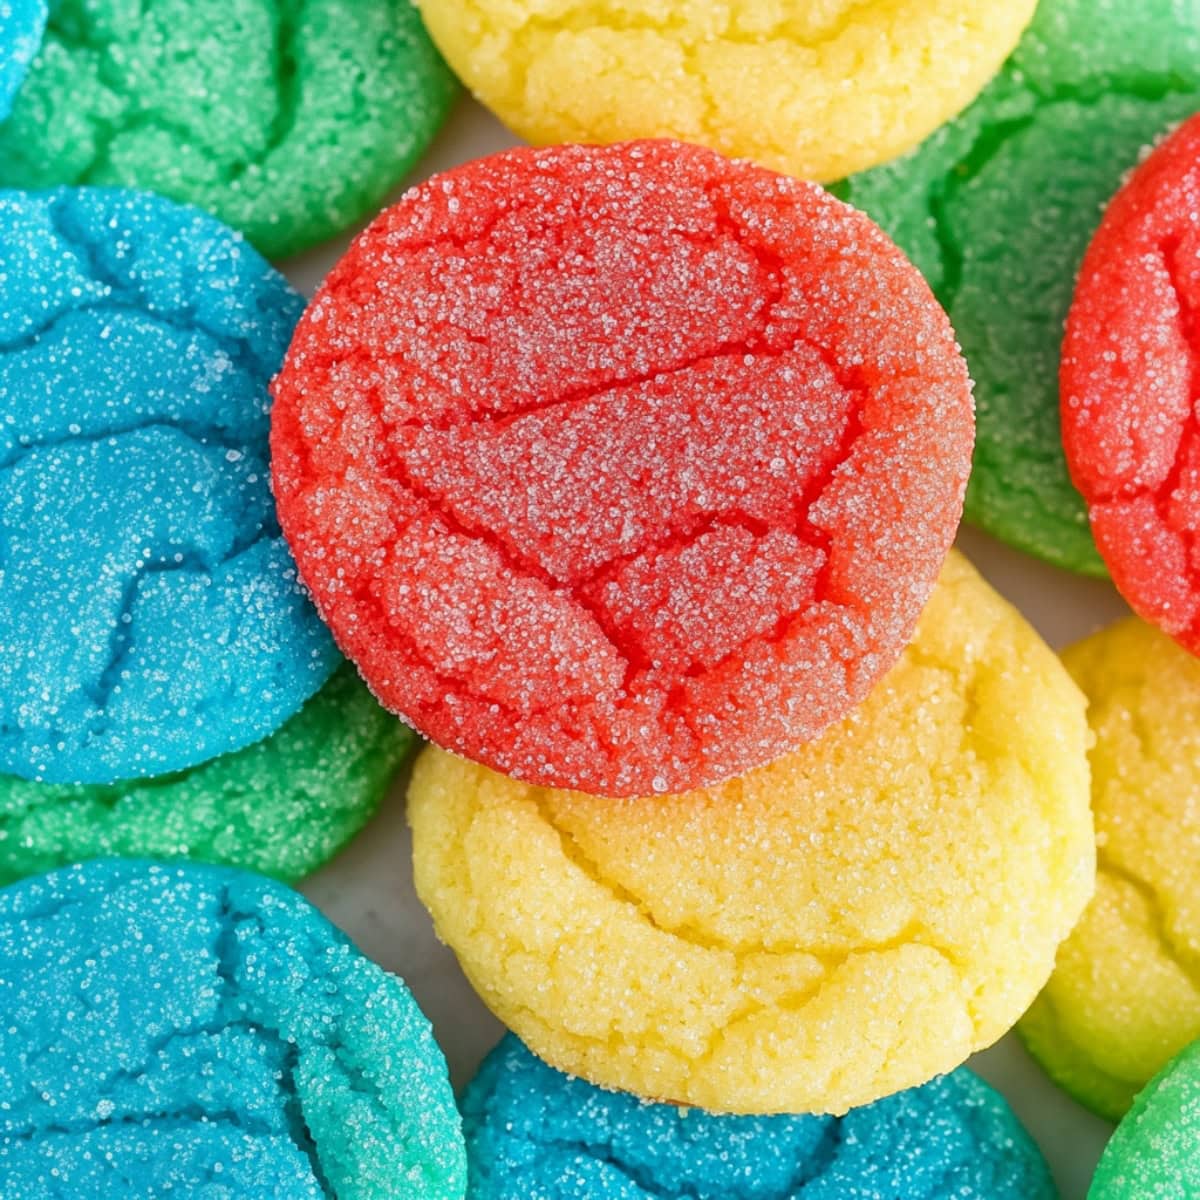
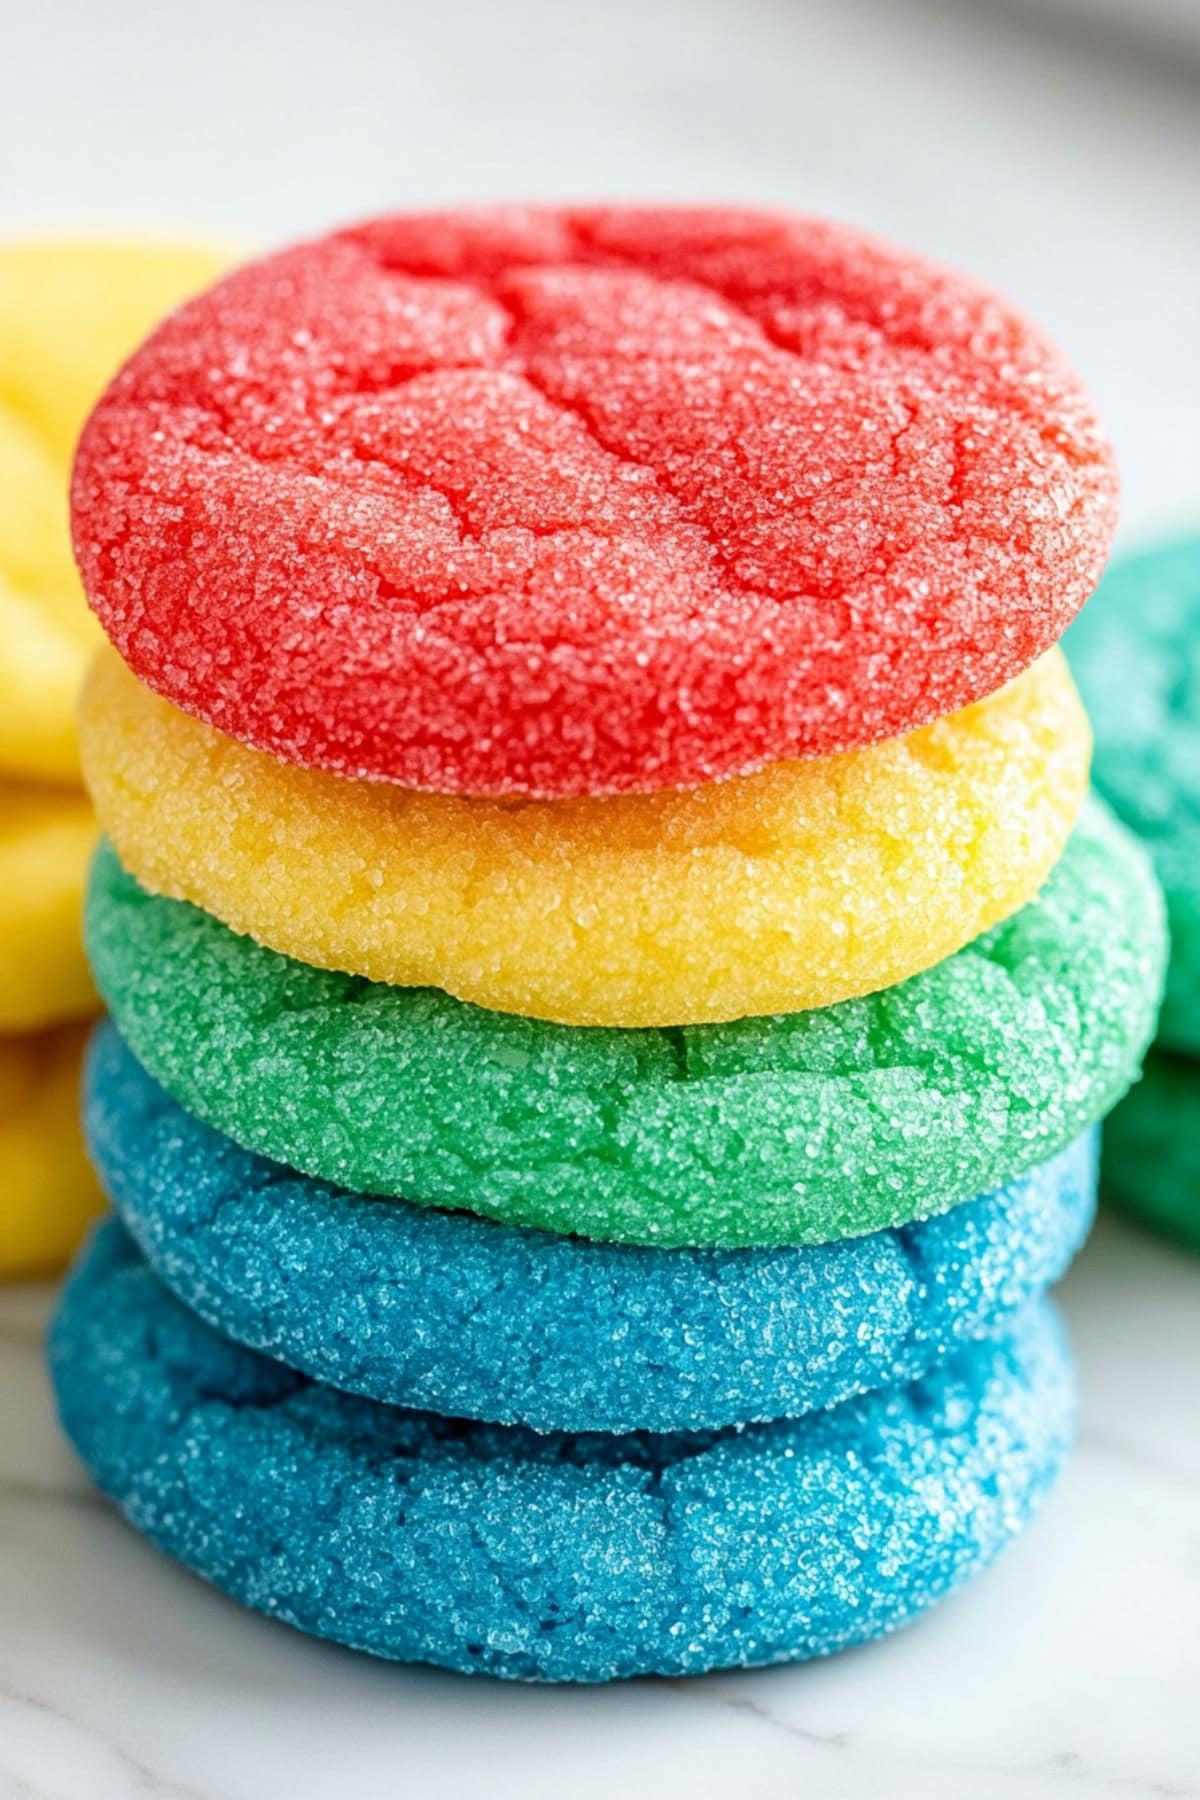
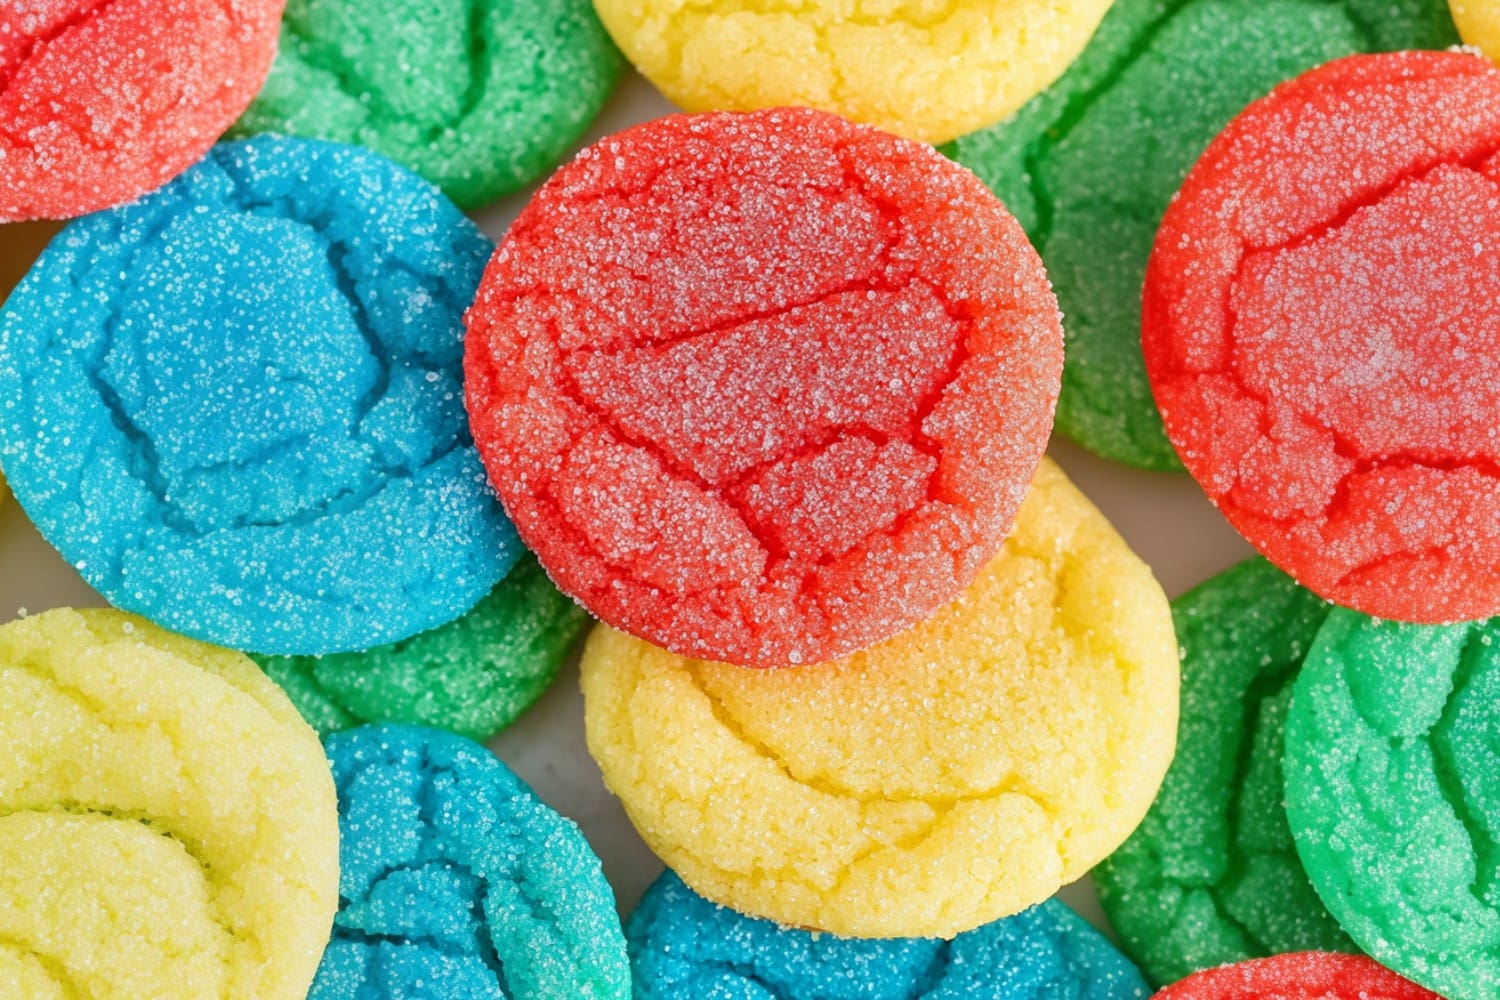
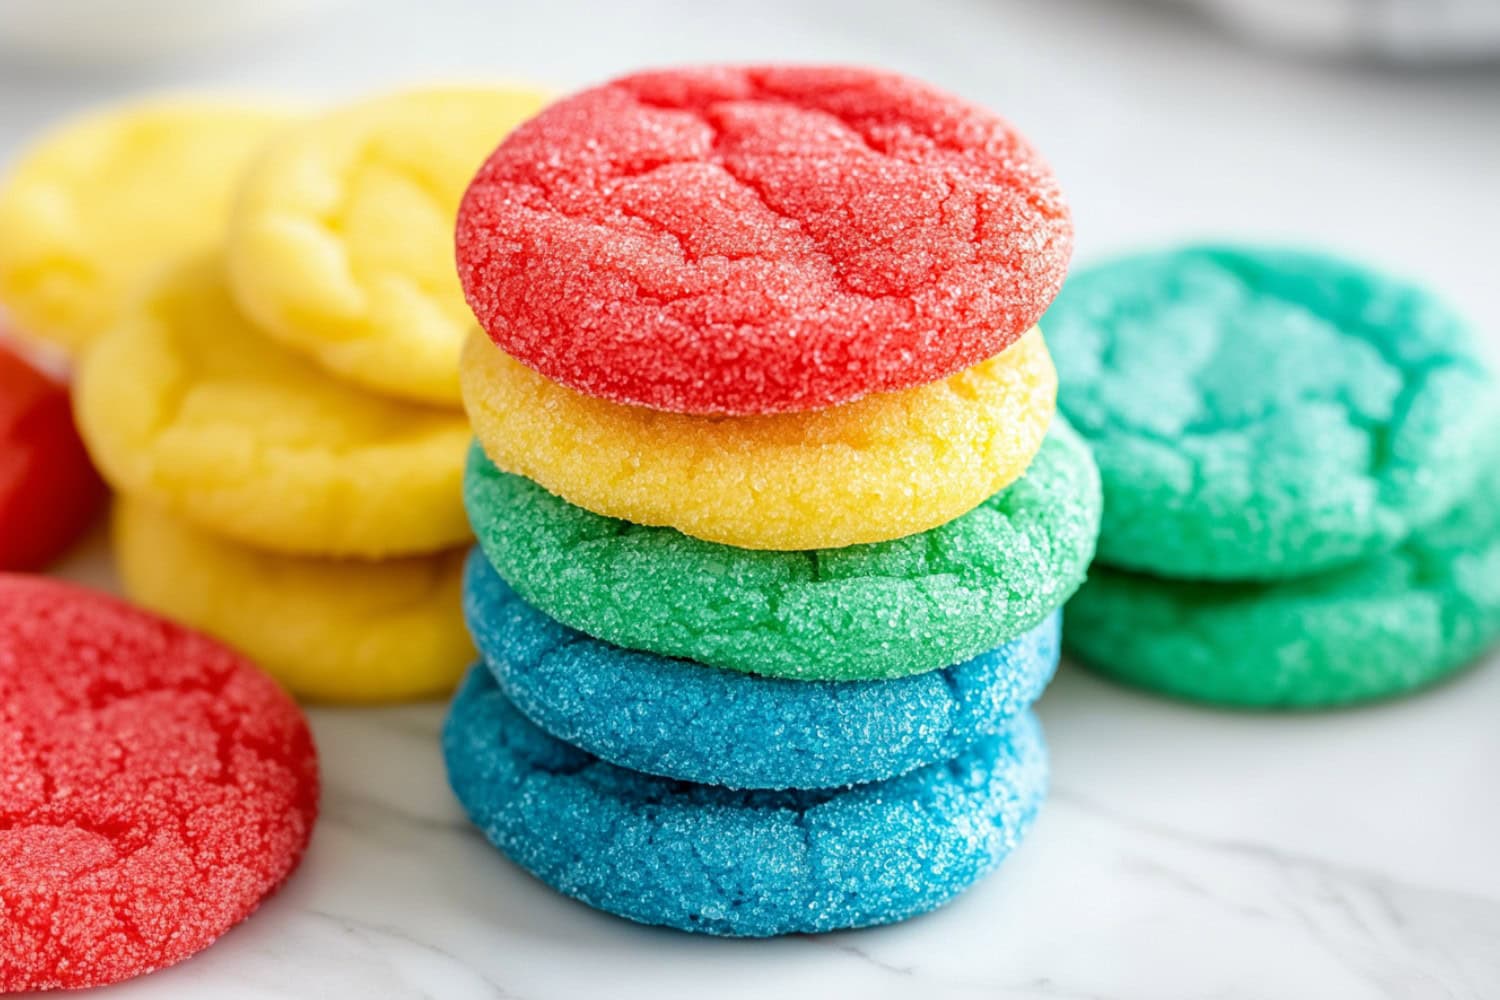
Vibrant Colors: Mix and match Jello flavors for a variety of colorful creations. Fun Flavors: Choose your favorite fruity flavors like strawberry, lemon, lime, orange, and grape. Kid-Friendly: Get the kids involved! They’ll love helping knead the colorful dough and rolling it into balls. Quick and Easy: Made with just a few simple ingredients and a box of Jello, this recipe comes together in no time!
Ingredients
Unsalted Butter : The base of the dough, giving it richness and a soft texture.
Granulated Sugar : Sweetens the cookies and adds that signature sparkle on the outside.
Egg + Egg Yolk : Adds structure and moisture, keeping the cookies soft and chewy.
Vanilla Extract : Brings a hint of warmth and sweetness to balance the fruity jello flavors.
All-Purpose Flour : Forms the structure for the dough, giving the cookies their shape.
Baking Powder & Baking Soda : Helps the cookies rise and stay light and fluffy.
Cream of Tartar : Adds a slight tang and keeps the cookies soft and tender.
Jello (Different Flavors) : Provides vibrant colors and fruity flavors, making these cookies fun and flavorful.
How to Make Jello Cookies
These eye-catching treats are not just a feast for the eyes but also a burst of flavor in every bite.
You can make them in single colors or marble them together to make them extra magical.
Either way, they’re a cinch to whip up:
- PREHEAT the oven to 350°F. Line 2-3 baking sheets with parchment paper. 2. BEAT the butter and 1 cup of sugar until light and fluffy. Add the egg, yolk, and vanilla. In a separate bowl, whisk the flour, baking powder, baking soda, and cream of tartar. 3. MIX the dry ingredients into the butter mixture to form a soft dough. 4. DIVIDE the dough into 4 portions and knead a jello mix into each. Add food coloring if desired, and chill for 30-60 minutes. 5. SHAPE the dough into 2 tablespoon-sized balls or combine small pieces of each color to form rainbow balls. Roll each ball in granulated sugar or extra jello powder for added color. Flatten slightly with a glass. 6. BAKE for 10-12 minutes until edges are lightly browned. Cool for 5 minutes, then transfer to a wire rack. Enjoy!
Tips For the Best Jello Cookies
Once you bite into one of these soft, chewy, and tangy cookies, you won’t be able to stop.
The same goes for your friends and family – and they’ll definitely want the recipe!
Here’s a few tips to keep in mind:
Jello distribution. Ensure the jello mix is evenly distributed throughout the dough so you get the best taste and color in every cookie.
Vibrant color option. For more intense and vibrant colors, consider adding a few drops of food coloring to the dough along with the jello mix.
Sugar coating tip. Roll the dough balls in granulated sugar immediately after shaping to ensure the sugar sticks well.
Chill for better shape. Don’t skip the chill, or the cookies will spread too much.
Flatten with care. Use the bottom of a glass to flatten the dough balls slightly, but avoid pressing too hard to prevent the cookies from becoming too thin.
Soft and chewy texture. To achieve a soft and chewy texture, slightly underbake the cookies. Bake until the bottoms are just barely golden.
How to Store
With so many jello flavors to choose from, the possibilities for these cookies are endless.
And yes, you can even make them ahead!
More Cookie Recipes You’ll Love
Thumbprint Cookies Edible Sugar Cookie Dough Almond Joy Cookies White Chocolate Cranberry Cookies
Jello Cookies
36
20
12
128
Jello cookies are colorful, fruity, and super fun! Soft and chewy with plenty of bright flavor, they’re perfect for parties or when you need a sweet treat.
Ingredients
- 1 cup unsalted butter, softened
- 1 1/2 cups granulated sugar, divided
- 1 large egg + 1 egg yolk
- 1 teaspoon vanilla extract
- 3 cups all-purpose flour
- 1/2 teaspoon baking powder
- 1/2 teaspoon baking soda
- 1/4 teaspoon cream of tartar
- 4 (3 ounce) packets jello, different flavors
Instructions
- Preheat oven to 350°F and line 2-3 baking sheets with parchment paper.
- In a large bowl, beat the butter and 1 cup of granulated sugar with an electric mixer on medium speed until light and fluffy. Reduce the speed to low and beat in the egg, yolk, and vanilla extract until well combined.
- In a separate bowl, whisk the flour, baking powder, baking soda, and cream of tartar. Gradually add the flour mixture to the butter mixture, mixing on low speed until a soft dough forms.
- Divide the dough into 4 equal portions (one for each color of jello mix). Knead 1 package of jello mix into each portion until the color is evenly distributed. If desired, add a few drops of food coloring for more vibrant colors. Wrap in plastic and chill for 30-60 minutes.
- Portion the dough into 2 tablespoon-sized balls. Alternatively, take about 1 teaspoon of each color and gently press them together to form a larger dough ball. Lightly roll the dough between your hands to mix the colors slightly.
- Roll each ball in the remaining granulated sugar for a sweet coating. Place the cookie dough balls on the prepared baking sheets about 2 inches apart. Using the bottom of a glass, flatten each ball slightly.
- Bake for 10-12 minutes or until the edges are lightly browned. Allow to cool on the baking sheets for 5 minutes before transferring to a wire rack to cool completely. Enjoy!
Notes
Slightly underbaking yields soft, chewy cookies. Bake until the bottoms are just barely golden.
If you can’t bake everything at once, keep any cookie dough you’re not baking in the fridge.
Share on Facebook
Share on Pinterest

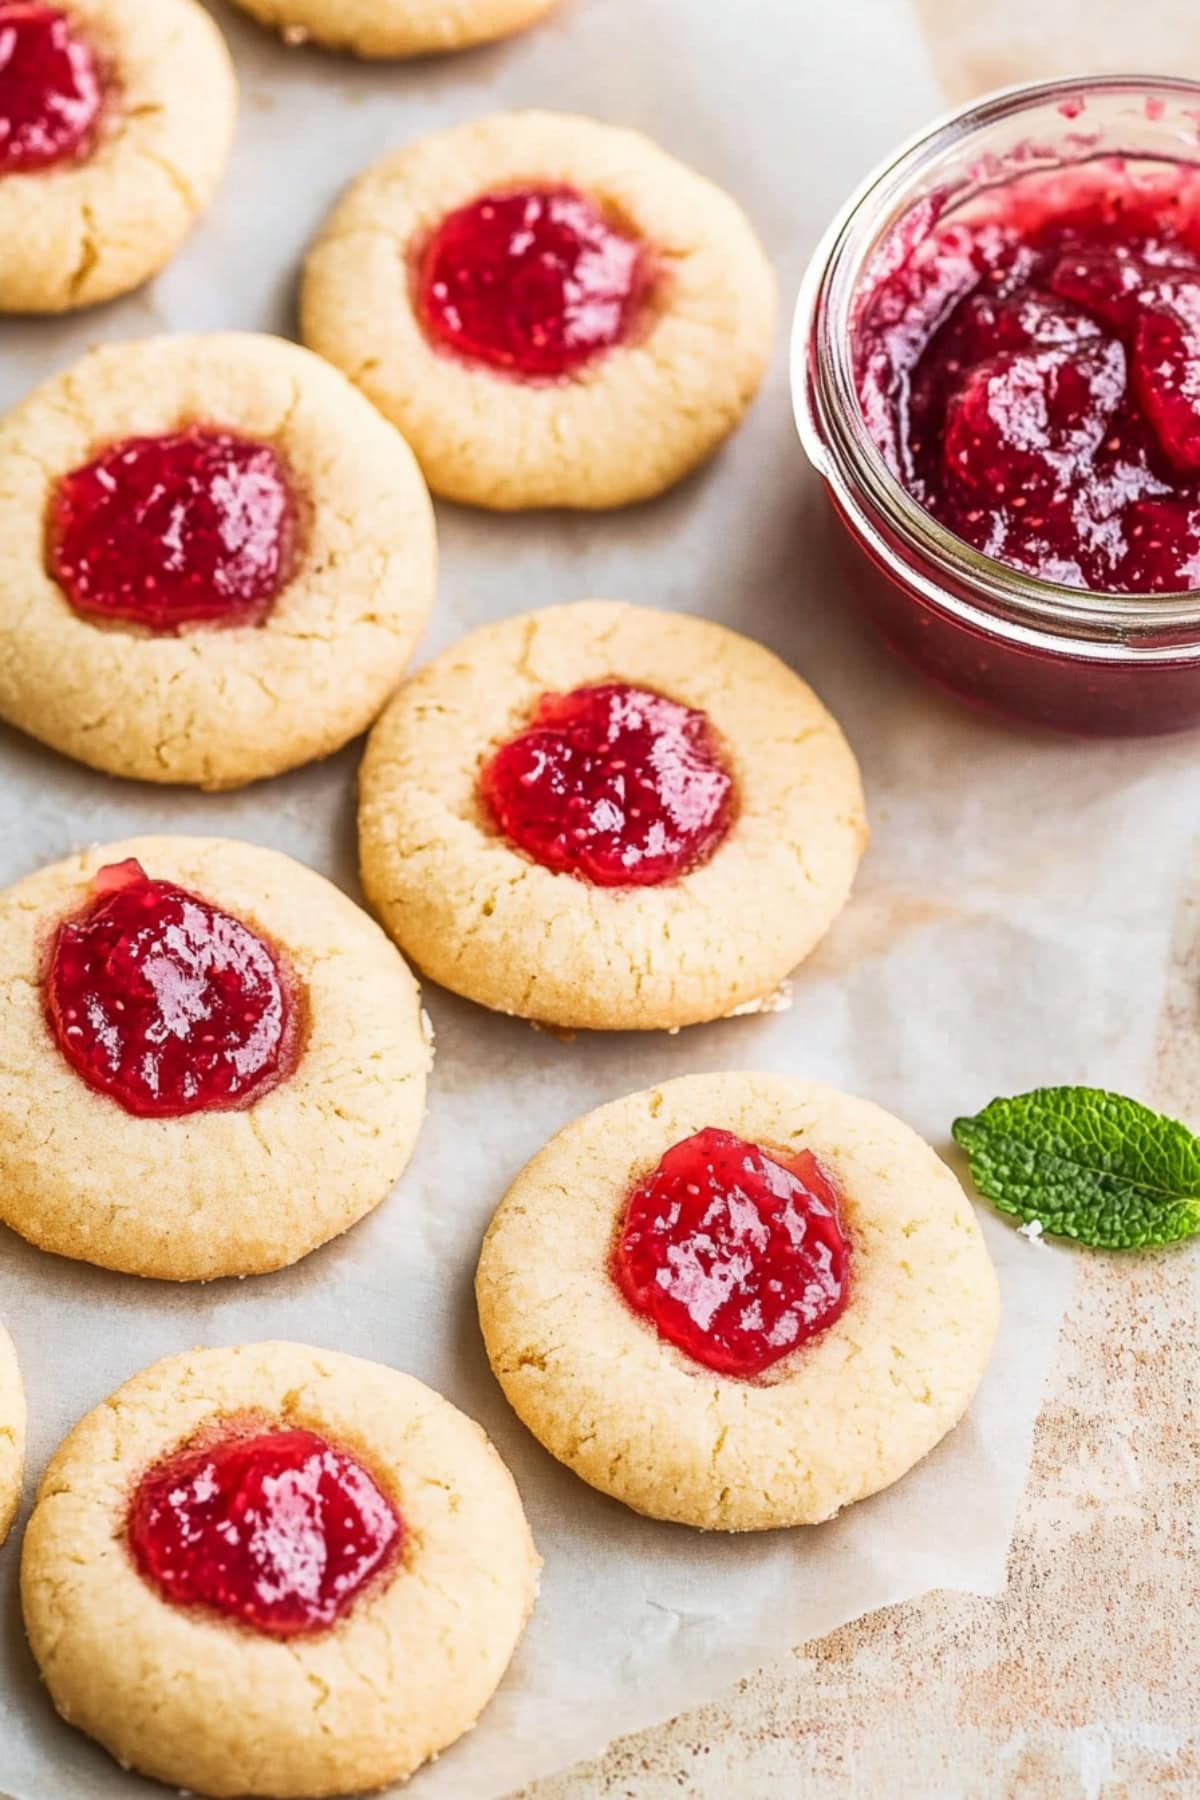
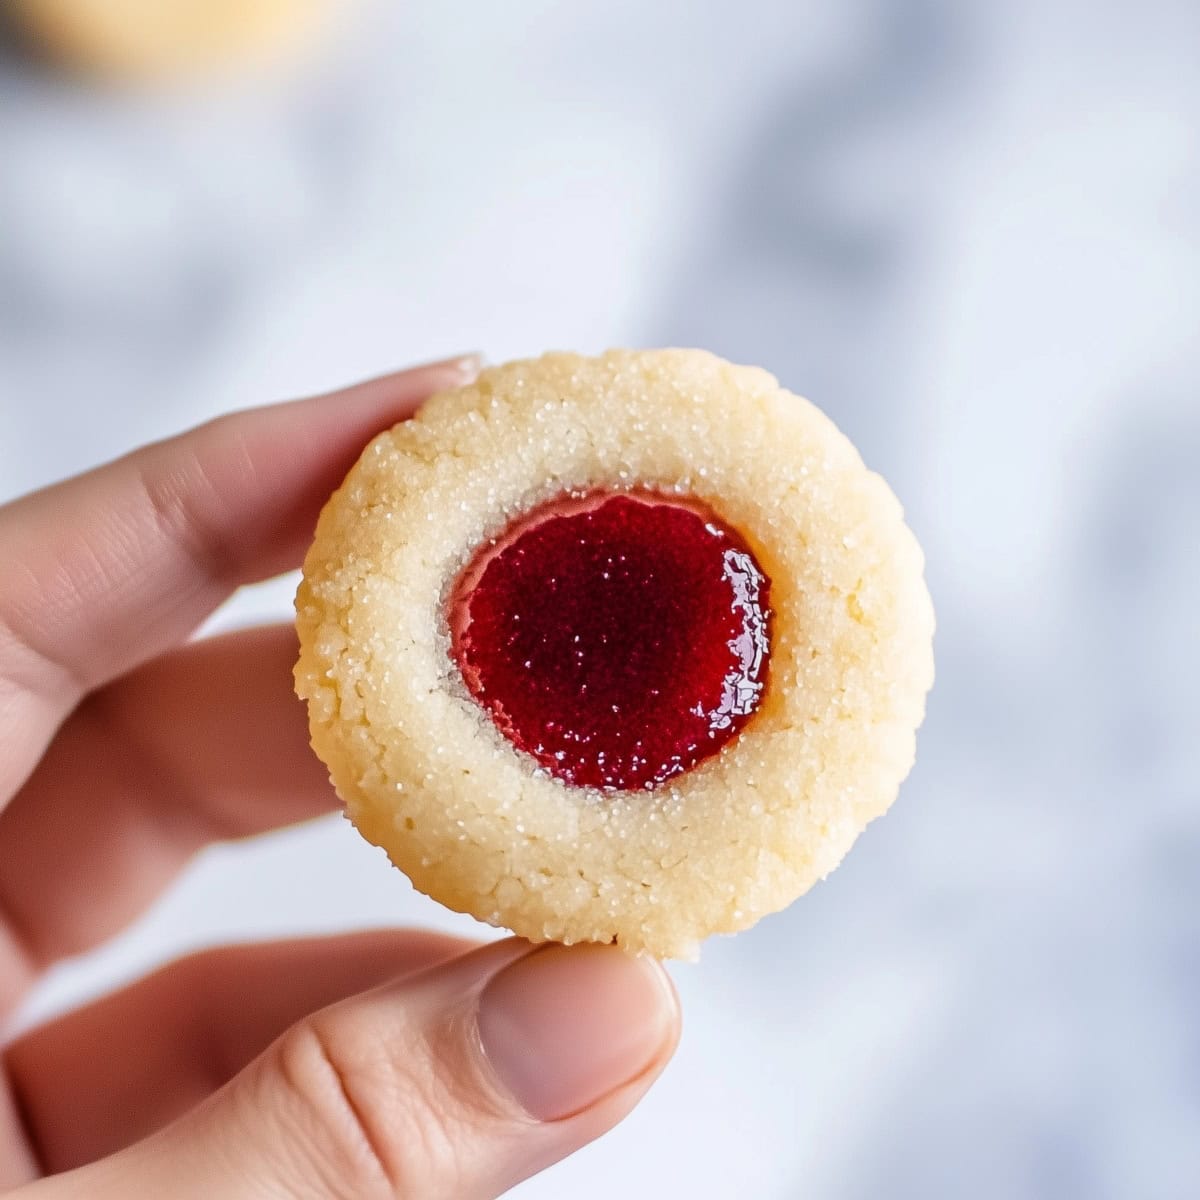
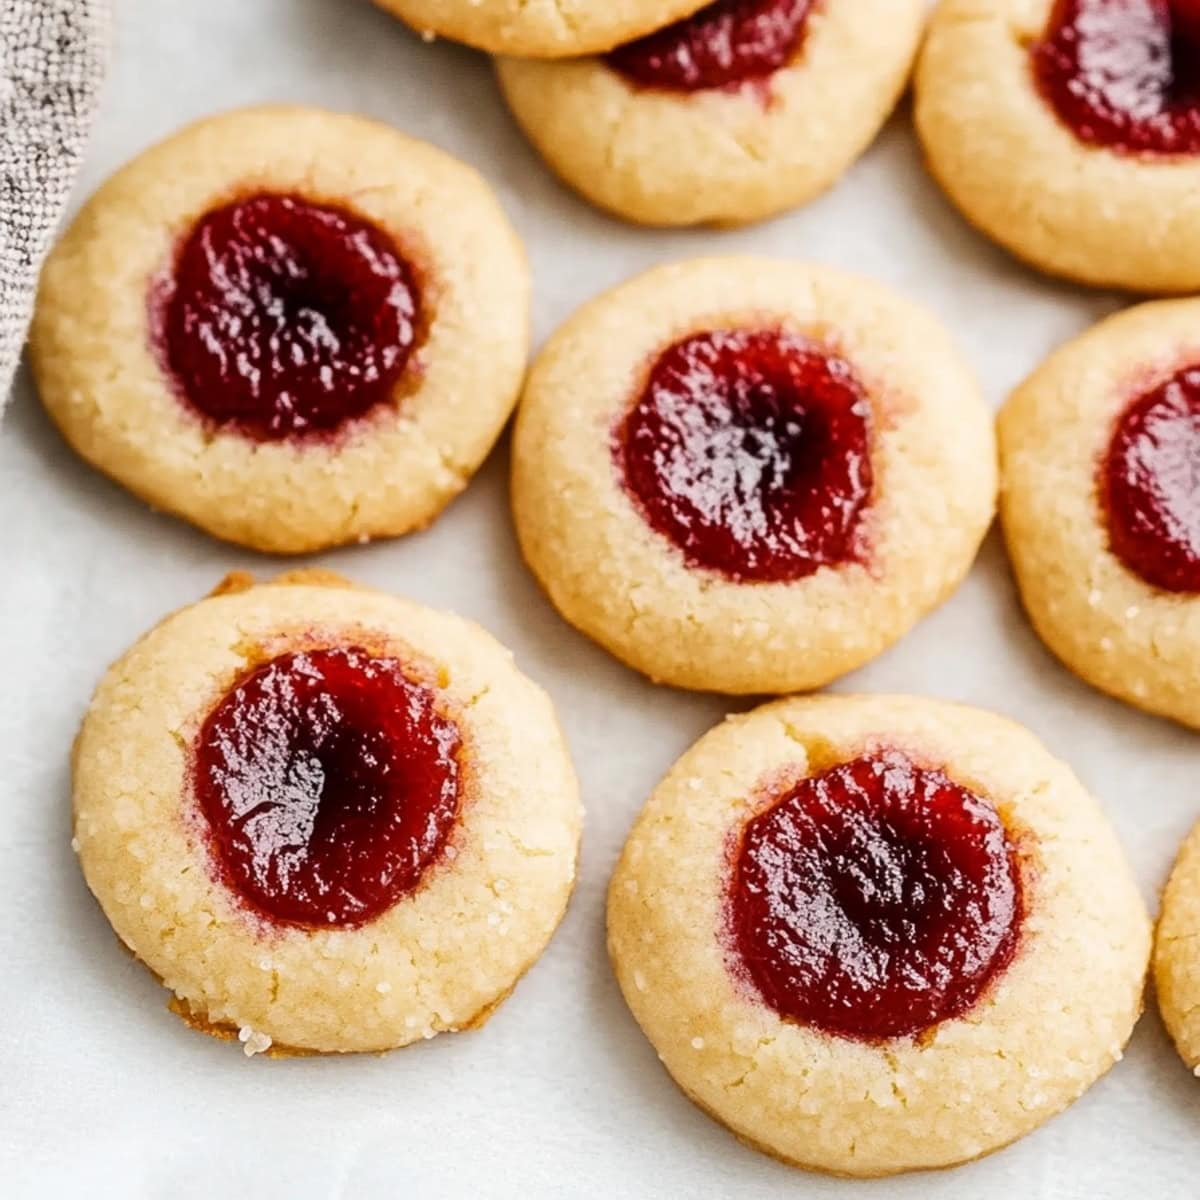
Looking for a buttery, melt-in-your-mouth treat to induce all kinds of nostalgia? These thumbprint cookies are just the thing.
They’re the perfect blend of sweet and fruity and an irresistible addition to any dessert table.
They feature crisp, golden edges and soft centers filled with your favorite jam.
They’re the kind of classic cookies your gramma and great-aunts used to make. And I am 100% here for them!
WANT TO SAVE THIS RECIPE?
Enter your email below & we’ll send it straight to your inbox.
Why You’ll Love These Thumbprint Cookies
Customizable: Strawberry jam, grape jam, apricot jam – use any flavor you like! Tender Texture: You’ll love the buttery, crumbly cookie base almost as much as the jam-packed center. Together, the two make a sweet, warm, and fruity harmonious blend of flavors. Aesthetic Appeal: The vibrant, jam-filled centers are eye-catching, making them excellent for gifting.
Ingredients
All-Purpose Flour & Cornstarch: The cookie dough’s foundation. They offer structure and texture.
Salt & Vanilla Extract: Simple but powerful flavor enhancers.
Granulated & Light Brown Sugar: For depth, sweetness, and flavor. The brown sugar also makes the cookies nice and chewy.
Unsalted Butter: Avoid margarine and stick to the real thing here. It gives the cookies their warm, buttery taste.
Large Egg Yolk: Just the yolk! It holds everything together and makes the cookies much more tender.
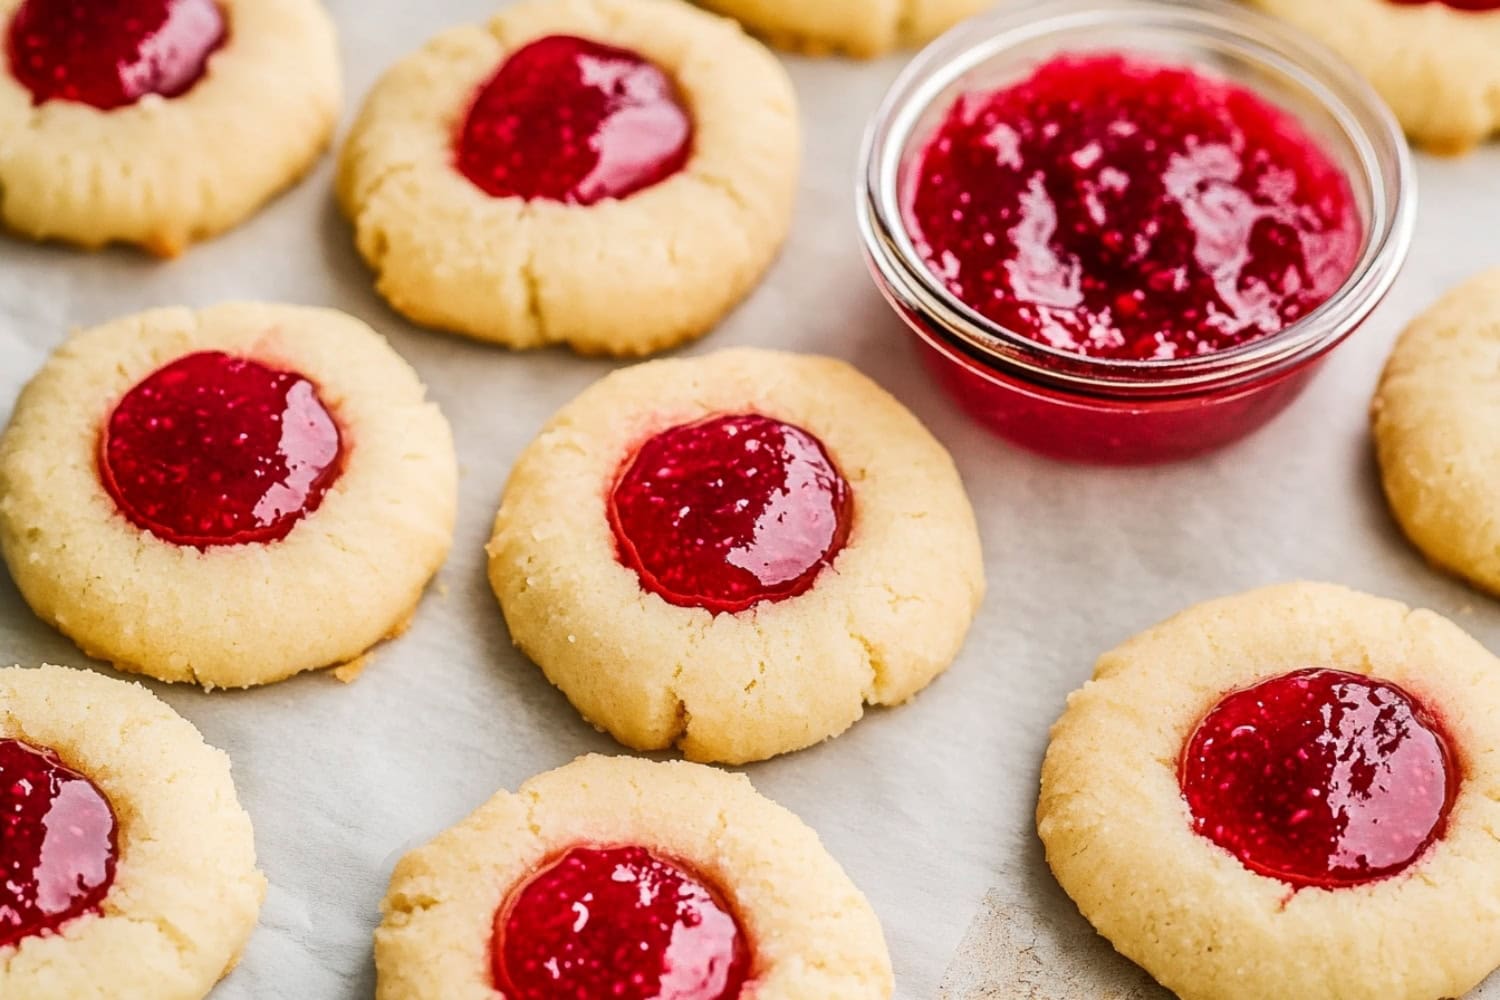
Jam: The colorful star of the show. It fits snugly into the center of each cookie for a bright burst of fruity sweetness. Use your own favorite jam recipes . Or for something truly unique and slightly savory, try this bourbon bacon jam .
How to Make Thumbprint Cookies
There’s something so satisfying about making these classic treats from scratch.
The buttery, crumbly cookie base pairs perfectly with the sweet, fruity jam center.
Check out these easy steps:
- WHISK the flour, cornstarch, and salt. Set aside. 2. BEAT the butter, brown sugar, and 1/4 cup of granulated sugar until light and fluffy. Blend in the egg yolk and vanilla until smooth. 3. MIX in the flour mixture by hand until the dough comes together. 4. SCOOP tablespoons of dough, roll into 1-inch balls, and coat with the remaining sugar (optional). Place on a parchment-lined sheet. 5. PRESS a small indentation into each cookie and fill with 1/2 teaspoon of jam. Chill for at least 1 hour. 6. PREHEAT the oven to 350°F and prepare another baking sheet. 7. BAKE the cookies for 10-12 minutes until golden at the edges. Cool before transferring to a wire rack. Enjoy!
Tips for the Best Thumbprint Cookies
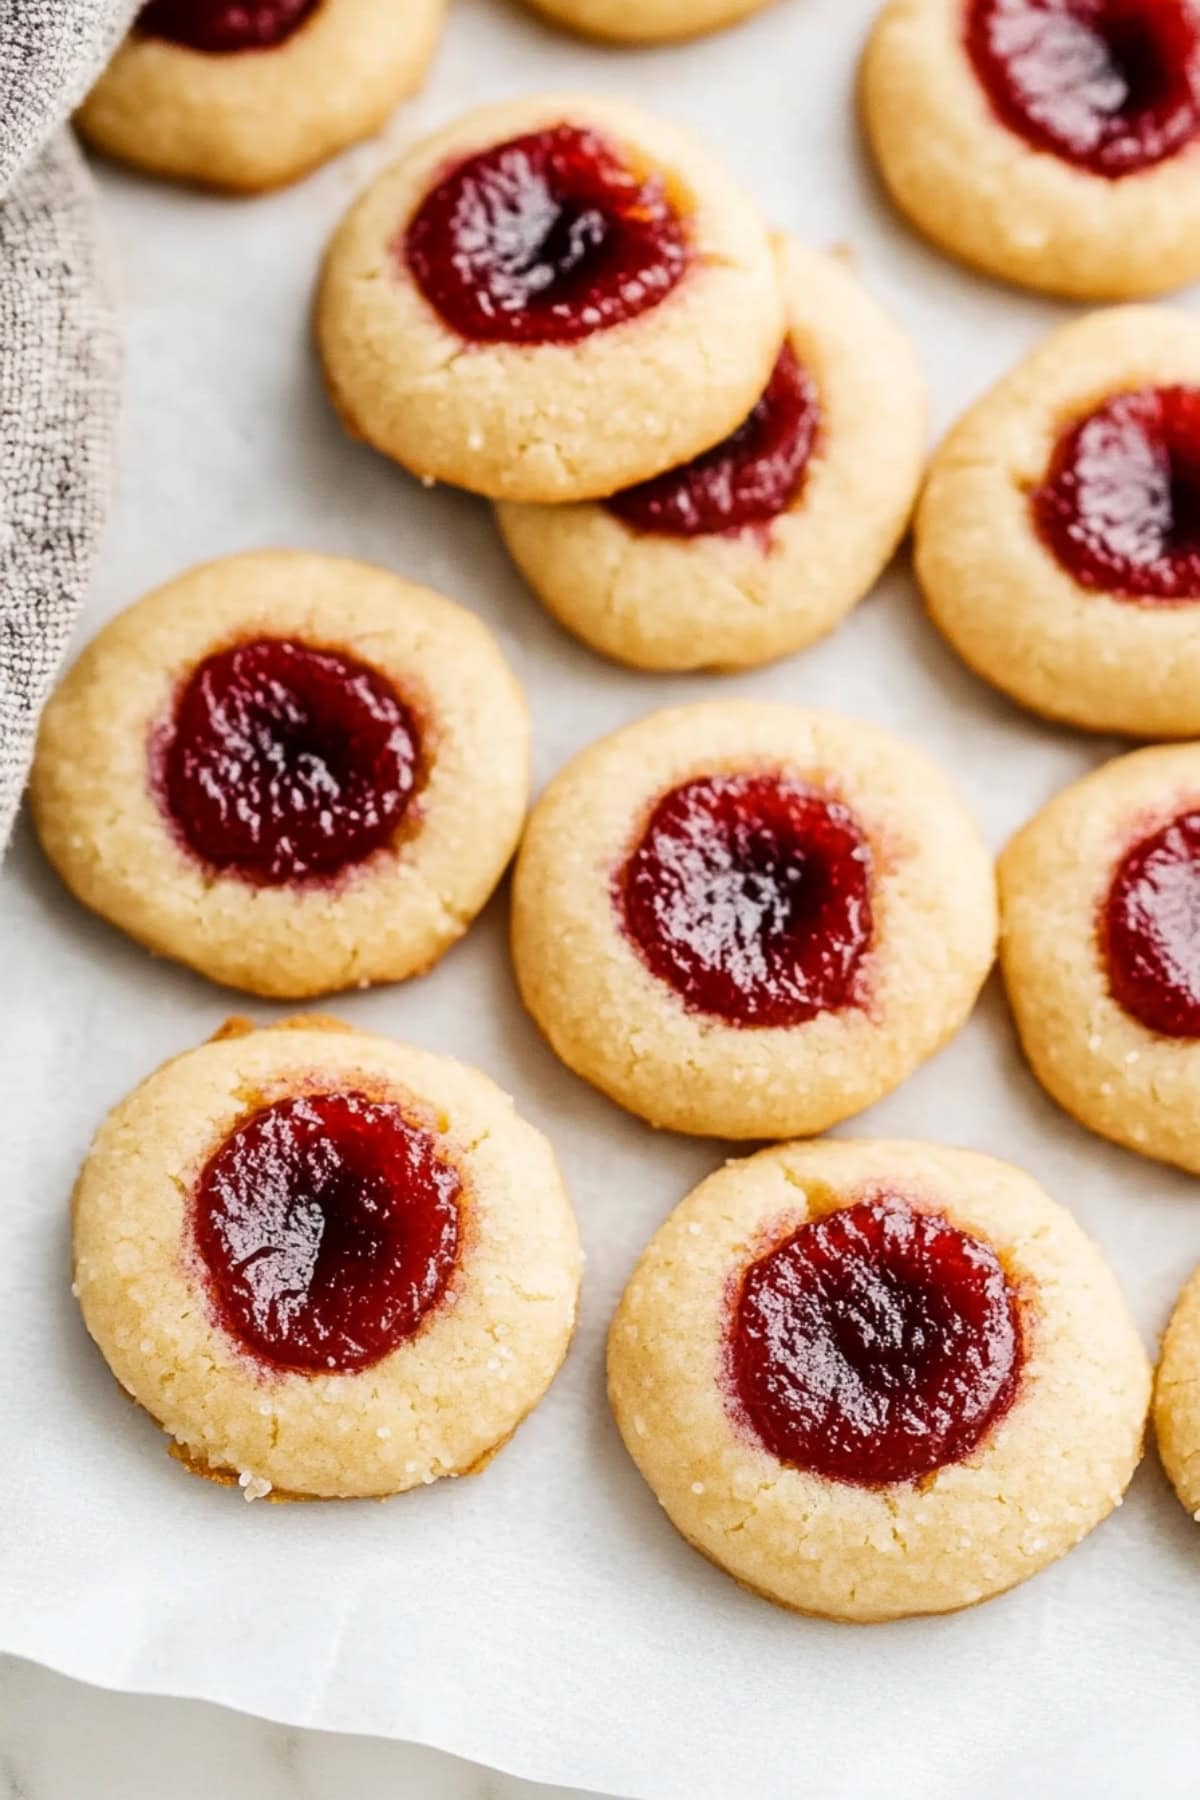
Thumbprints are one of those cookies that look impressive but are actually super easy to make.
Rolling the dough in sugar before baking gives them a sparkly, festive finish, so they’re perfect for holiday cookie trays.
Keep these tips in mind when making them:
Use softened butter. If it’s softened to room temperature, it’ll be easier to cream with the sugars.
Avoid overmixing. I like to add the flour by hand so the cookies aren’t tough.
Chill the dough. Pop it in the fridge right after making it, then again after shaping it. This will make it easier to handle and will keep the cookies from spreading.
Size the cookies evenly. Use a mini cookie scoop so they all bake evenly.
Don’t press too hard. If you make the indents too deep, the edges of the cookies will crack. Also, be sure not to overfill the indentations when adding the jam. If you do, it can spill onto the tray and burn.
Try flavor variations. Besides swapping the jams, you can also roll the cookies in finely chopped walnuts or pecans before adding the indents. You can also fill them with lemon curd or chocolate ganache instead of jam.
How to Store
These cookies taste great warm or chilled. So you don’t have to worry about reheating leftovers.
If you freeze them, just let them thaw a bit at room temperature before eating.
To Store: Place the cookies in an airtight container with parchment paper between the layers. Keep at room temperature for up to 5 days or in the fridge for a week. To Freeze: Place the cookies on a baking sheet and flash-freeze them until solid. Then, store in a freezer-safe bag or container for up to 3 months.
More Delicious Cookies You Have to Try
Frosted Eggnog Cookies Brown Butter Snickerdoodle Cookies Potato Chip Cookies Pumpkin Snickerdoodle Cookies
Thumbprint Cookies
35-40
20
12
105
Sweet, buttery thumbprint cookies filled with your favorite jam are the perfect bite-sized treats for any occasion. And they’re so easy to make!
Ingredients
- 2 1/4 cups all-purpose flour
- 2 teaspoons cornstarch
- 1/2 teaspoon salt
- 1 cup unsalted butter, room temperature
- 1/2 cup light brown sugar, packed
- 1/2 cup granulated sugar, divided
- 1 large egg yolk
- 2 teaspoons vanilla extract
- 1/2 cup jam
Instructions
- In a medium bowl, whisk the flour, cornstarch, and salt. Set aside.
- In a large bowl, beat the butter, brown sugar, and 1/4 cup of granulated sugar with an electric mixer on medium speed until light and fluffy, about 2-3 minutes. Blend in the egg yolk and vanilla until smooth.
- Stir the flour mixture in by hand until just combined. The dough will be crumbly at first but will come together as the mixing continues.
- Scoop rounded tablespoons of dough and roll into 1-inch balls. Roll each ball in the remaining 1/4 cup of granulated sugar until well coated (optional). Place the cookies on a parchment-lined baking sheet.
- Use your thumb or the handle of a wooden spoon to create an indent in the center of each cookie. Spoon about 1/2 teaspoon of jam into the space. Place the tray in the fridge for at least an hour or in the freezer for 30 minutes.
- Preheat the oven to 350 degrees Fahrenheit and line another baking sheet with parchment paper.
- Arrange the cookies over the baking sheets with 1-2 inches between them. Bake for 10-12 minutes, until the edges are lightly golden brown. Let the cookies cool on the baking sheets for 5-10 minutes before transferring to a wire rack to cool completely. Enjoy!
Notes
Avoid overfilling the cookies with jam, as it can burn if it bubbles over onto the tray.
Chill the dough after making it and again after shaping it. Also, keep any unbaked cookies in the fridge when not baking.
For a nuttier flavor, roll the cookies in finely chopped walnuts or pecans.
Share on Facebook
Share on Pinterest
